Use SPT tool and multicore_trigger image to kick off cm7 binary image
This section introduces how to create a CM7 POR boot image with the aid of a CM33 kicker application. The CM33 kicker application is located in demo_apps/multicore_trigger.
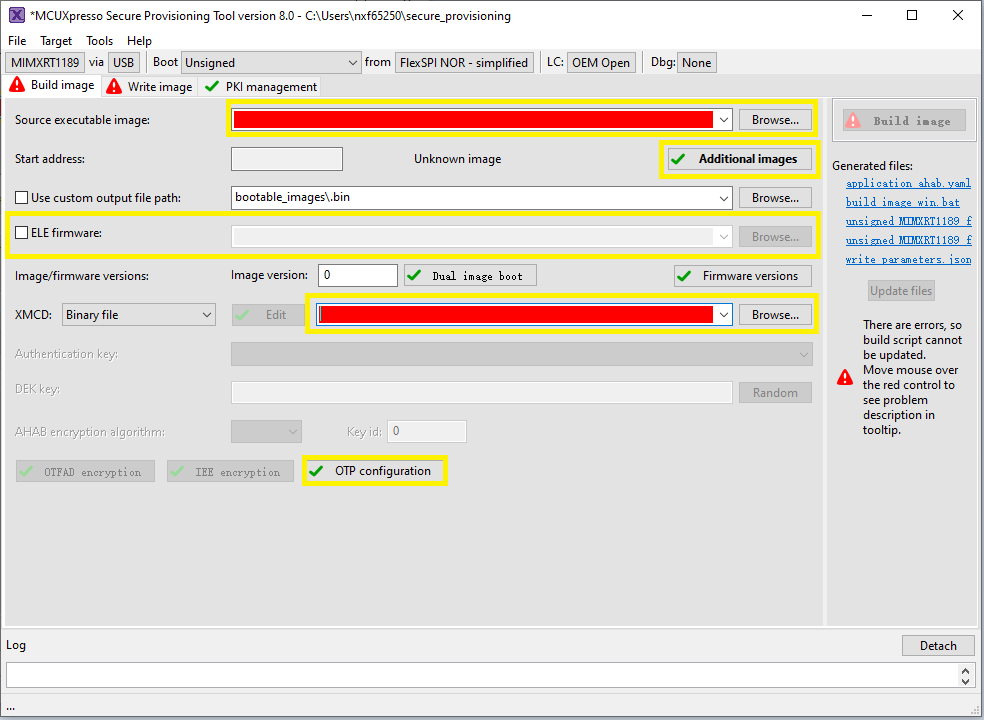
For a secure provisioning tool to generate such a bootable CM7 image, specify the CM33 multicore_trigger image in Source executable image. The CM7 application image to be kicked off must be specified with additional images.
CM7 XIP image runs from external FLASH, and multicore_trigger CM33 image runs from internal RAM
Perform the following steps:
Prepare the
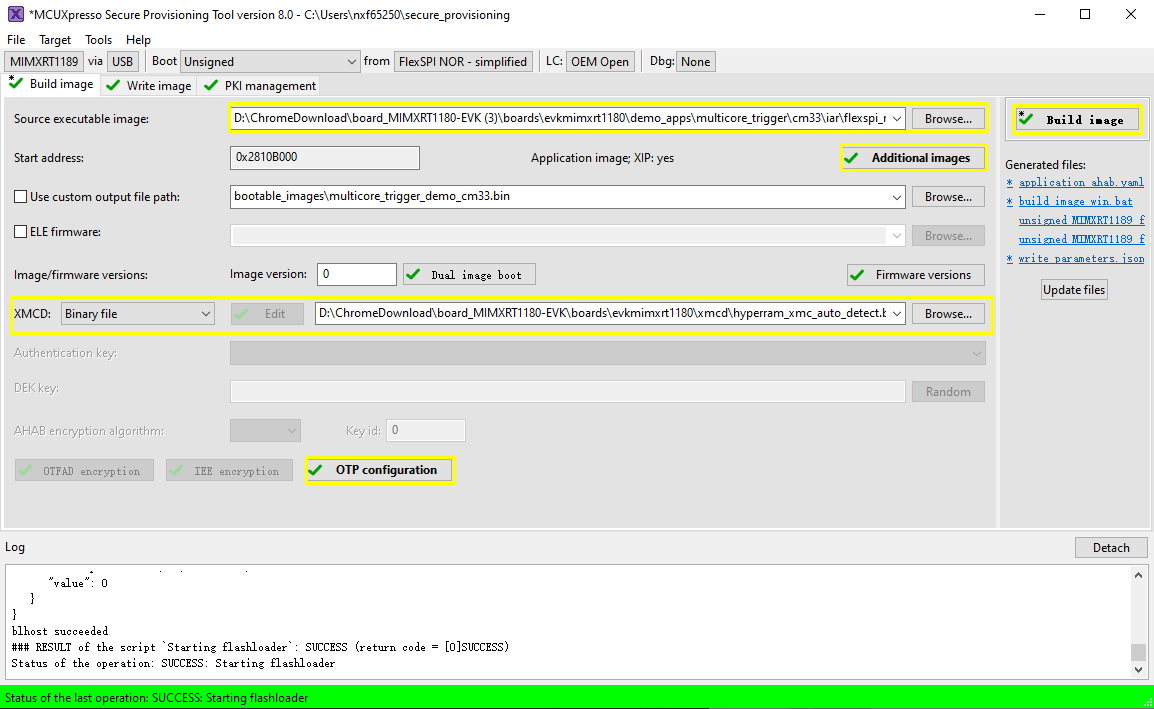
multicore_trigger_demo_cm33ram image (debugorreleasetargets) and specify it inSource executable image.Specify the XMCD file if necessary, refer to Use SPT tool to boot cm33 image.
Use
Additional imagesto specify CM7 application image running from flash memory. See Table 1 for how to fill in the necessary information for this additional image.Parameter
Value
Explanation
Image offset
0x007FF000The offset in bytes from the beginning of the current container header to beginning of the image. In our case, the CM7 image is flashed to
0x2880_0000. The container header is put to0x2800_1000and the yield offset =0x7F_F000Load address
0x28800000The destintion address of the CM7 image. ROM copies the image to load address, if it is not within flash address space. In our case, copy does not happen
Entry point
0x28800000The start address of CM7 image vector table from the CM7 core address space
Core ID
cortex-m7
Specify the core ID
Image type
Executable
Specify the image type
Encrypted
No
Specify the encryption

(Optional) ELE firmware.
It is required for certain application images which need special ELE FW service. For most SDK demos, leaves it empty.
Use
Build imageto build the combined bootable image.SW5[1..4]needs to be set to0001to let the SOC in serial download mode here.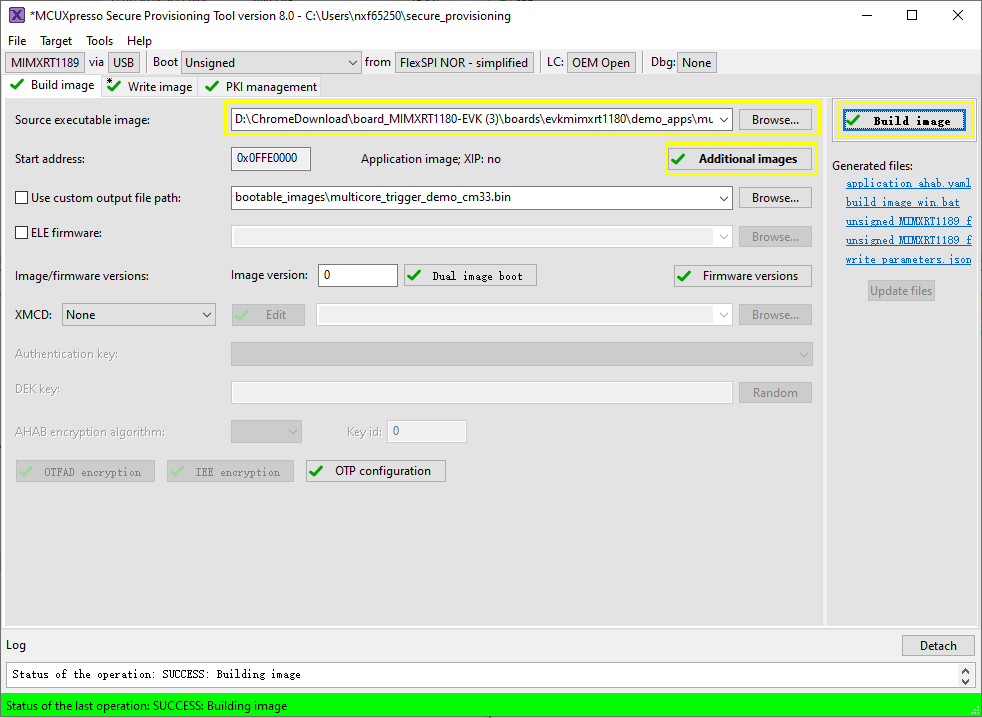
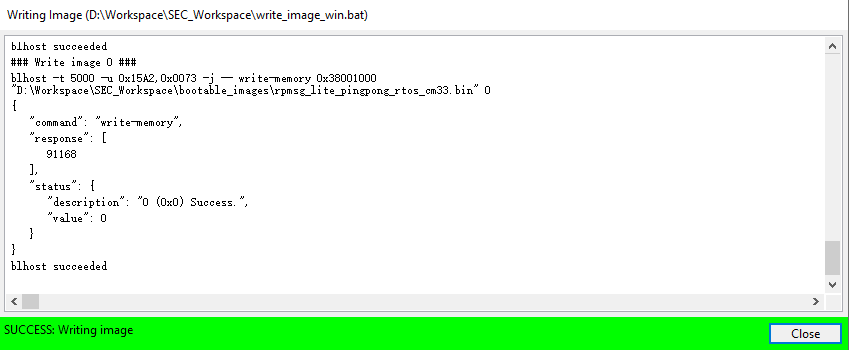
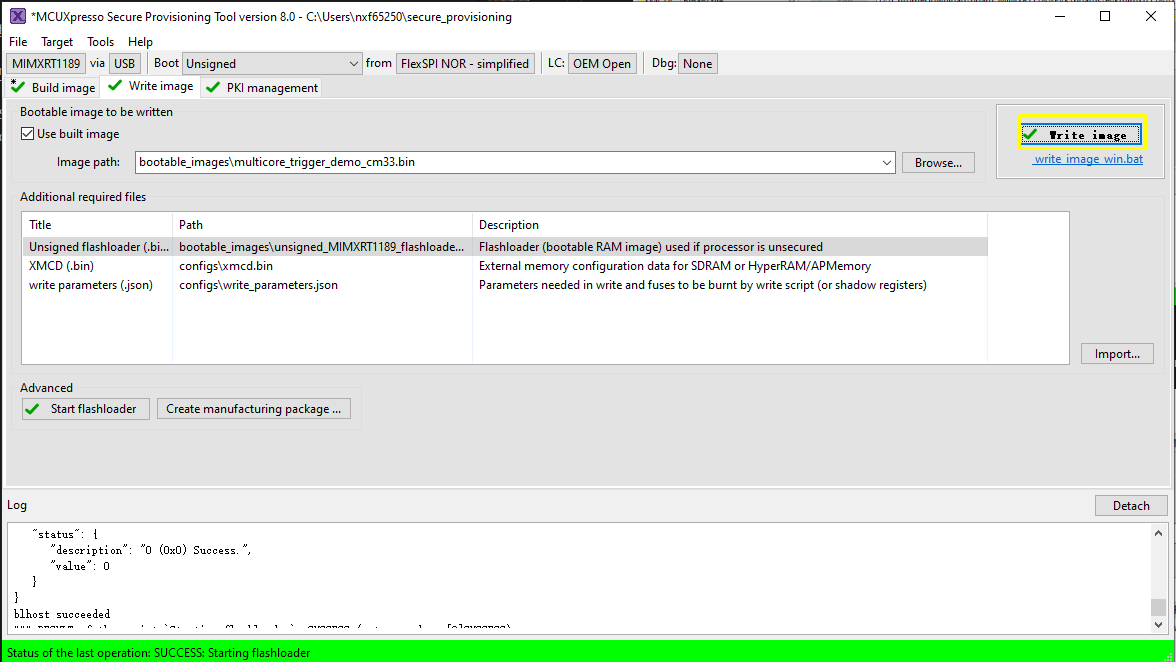
Use
Write imageto flash the image.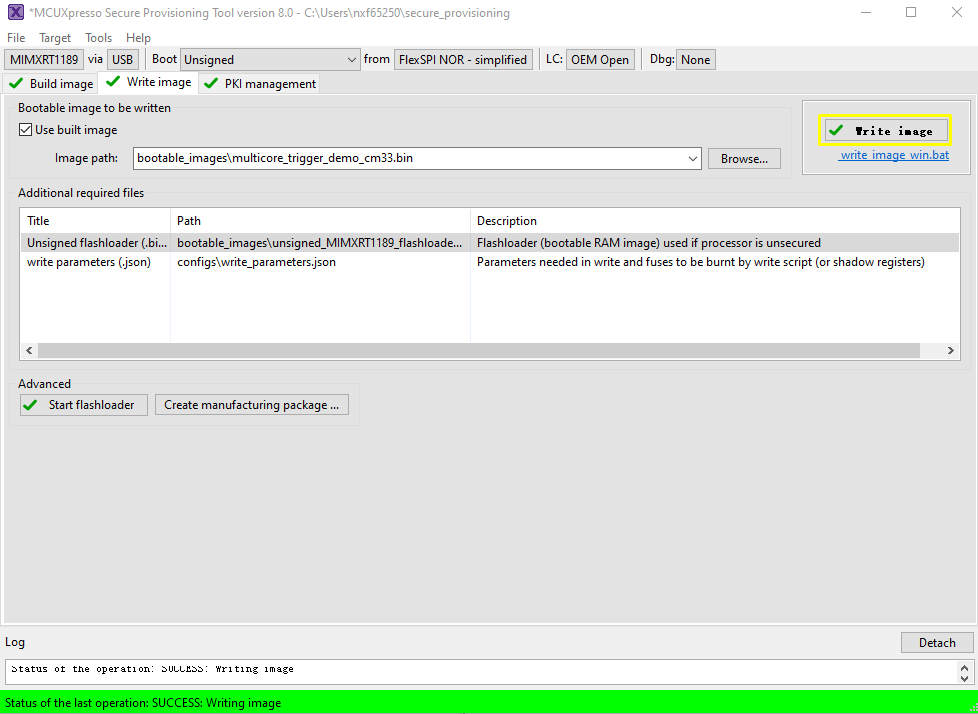
After a successful write, change the SW5[1..4] to QSPI boot mode 0100 and reset the board. You can observe that the image is running from POR boot.
Parent topic:Use SPT tool and multicore_trigger image to kick off cm7 binary image
CM7 binary image runs from internal TCM, and multicore_trigger CM33 image runs from external FLASH
Note: Be very careful that this scenario requires fuse manipulation, which is not revertible.
Prepare the
multicore_trigger_demo_cm33flash target image (flexspi_nor_debugorflexspi_nor_release) and specify it inSource executable image.Use
Additional imagesto specify CM7 application image running from ITCM memory. See Table 1 for how to fill in necessary information for this additional image.Parameter
Value
Explanation
Image offset
0xFF000The offset in bytes from the beginning of the current container header to beginning of the image. In our case, the CM7 TCM image is flashed to
0x2810_0000. The container header is put to0x2800_1000and the yield offset =0xF_F000Load address
0x303C0000The secured alias of CM7 ITCM in CM33/ROM memory space. ROM will copy image to this address
Entry point
0x0The start address of vector table from CM7 core address space
Core ID
cortex-m7
Specify the core ID
Image type
Executable
SPecify the image type
Encrypted
No
Specify the encryption

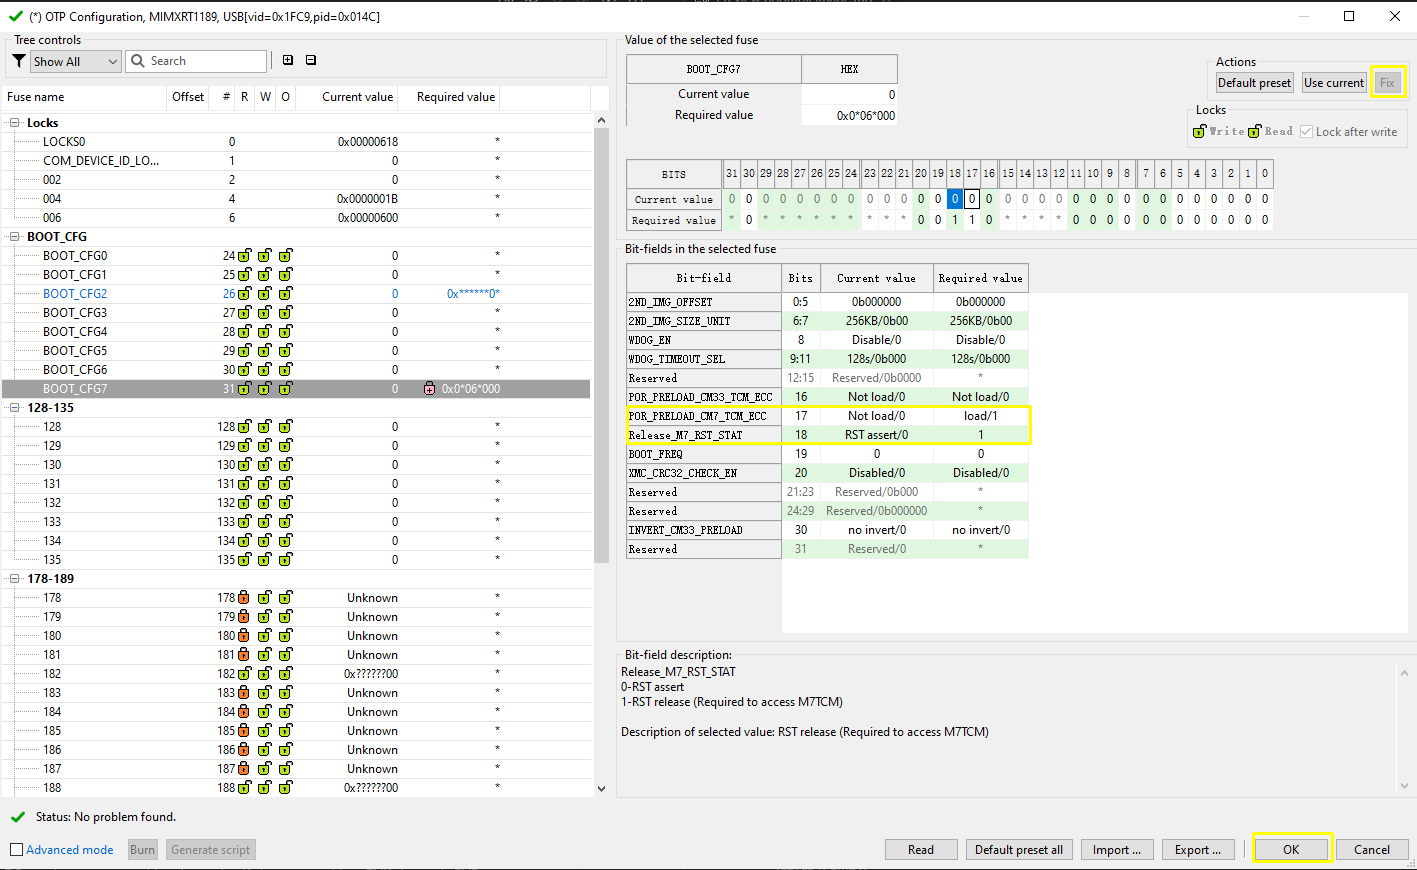
For ROM to successful copy image from flash to CM7 TCM. CM7 TCM ECC should be pre-configured. To archive this, a Fuse need to be set. Click OTP configuration, set
POR_PRELOAD_CM7_TCM_ECCandRELEASE_M7_RST_STATfuses inBOOT_CFG7to 1.Note: Be very careful that any setting on OTP cannot be reverted once set. There is possibility that the chip get bricked if you are fusing the wrong fuse word. Only do this if you really need to try this boot scenario.
(Optional) ELE firmware.
It is needed for a certain application image which needs a special ELE FW service. For most SDK demos, simply leave it empty.
After a successful write, change the SW5[1..4] to QSPI boot mode 0100 and reset the board. You can observe that the image is running from the POR boot.
Note:
The new image constructed under Build images is still not a complete image, and the Memory Configuration Block is missing. When writing image, SPT downloads the contents of the Memory Configuration Block to FLASH.
When CM33 + CM7 image runs with the following target combination, it is required to set
CM33_SET_TRDCto 1U inmulticore_triggerdemo, also requires to setCM33_SET_TRDCto 1U in CM7 demo if it exists.- CM33 flexspi + CM7 flexspi, flexspi means flexspi_nor_debug/release, flexspi_nor_sdram_debug/release, flexspi_nor_hyperram_debug/release - CM33 HYPERRAM + CM7 HYPERRAM, HYPERRAM means hyperram_txt_debug/release.
Only those
cm7projects whose linkages are similar withhello_world_demo_cm7, support POR run viamulticore_trigger_cm33.
Parent topic:Use SPT tool and multicore_trigger image to kick off cm7 binary image
Parent topic:Bootable image generation