Working with SEC
MCUXpresso Secure Provisioning Tool (SEC) is a tool made to simplify the generation and provisioning of bootable executables on NXP MCU platforms. It also offers a command-line interface, enabling integration in automated environments or customization of image building/burning procedure.
SEC features are used to generate bootable executables for the targets for which otherwise the bootable executable is not available.
For the integration between MCUXpresso for VS Code extension and SEC to work properly, the user must first use MCUXpresso Installer to install SEC.
SEC Tool Installation and Configuration
Minimum SEC Tool Version: 25.3 or higher. Supported Platforms: Windows, macOS, Linux.
Automatic Detection
The MCUXpresso extension automatically detects SEC Tool installations by first checking if you’ve manually configured the SEC Tool path in VS Code User Settings, then scanning Standard Installation Locations:
Windows: C:\nxp\MCUX_Provi_\bin\securep.exe or C:\nxp\SEC_Provi_\bin\securep.exe
macOS: /Applications/MCUX_Provi_*/SecureProvisioning.app/Contents/MacOS/securep
Linux: /opt/nxp/MCUX_Provi_/bin/securep or /opt/nxp/SEC_Provi_/bin/securep
Note: If multiple versions are found, the extension automatically selects the newest version.
If SEC Tool is not detected automatically, you’ll be prompted with the following options:
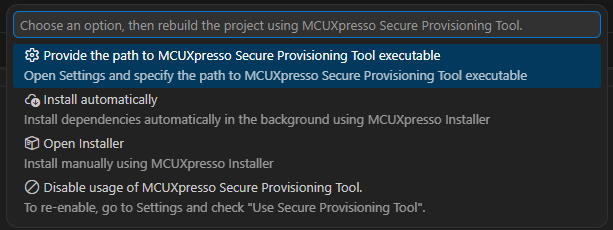
Option 1: Configure in Settings
Best for: Custom installation locations or manual configuration
Click “⚙️ Configure in Settings”.
VS Code settings will open automatically.
Enter the full path to the securep executable in the mcux.secTool.path setting.
Retry your operation.
Option 2: Install Automatically (Recommended)
Best for: Quick setup with minimal effort.
Requirements: Internet connection and MCUXpresso Installer integration enabled.
Steps:
Click “☁️ Install Automatically”.
Wait for download and installation (progress shown in notification). Extension will automatically detect the new installation.
Operation will automatically continue.
Option 3: Open MCUXpresso Installer
Best for: Manual installation or when you need additional NXP tools.
Steps:
Click “📦 Open MCUXpresso Installer”.
In MCUXpresso Installer application browse to Secure Provisioning Tool package.
Click Install. Wait for installation to complete.
Return to VS Code and retry your operation.
Option 4: Disable SEC Tool Usage
Best for: When you don’t need MCUXpresso Secure Provisioning features.
Click “🚫 Disable SEC Tool Usage”. Current operation will be cancelled and MCUXpresso Secure Provisioning features will be disabled.
To re-enable, open VS Code Settings and search for mcux.secTool.usage, then check the box to enable SEC Tool features again.
RT118x
The integration with SEC is available for the flexspi_nor_debug and flexspi_nor_release build configurations for RT118x targets:
evkmimxrt1180 with derivatives (1181, 1182, 1187, 1189)
frdm-imx1186 with derivatives (1185, 118C, 1186)
When using these configurations, after building the RT118x project, the MCUXpresso extension will invoke SEC to generate bootable executable for the project.
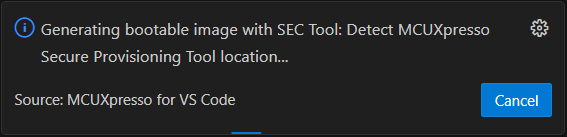
Corresponding messages will appear to make the user aware of the still in progress actions. The MCUXpresso extension will search for SEC Tool as described in the Automatic Detection section above:
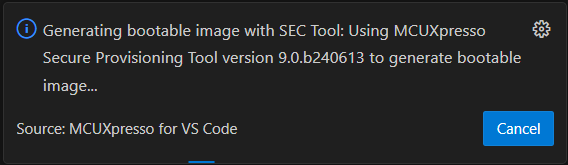
Then, using the detected SEC Tool, the bootable executable will be generated:
The command used for invoking and generating the bootable image will appear in MCUXpresso for VS Code Output console, along with the output of the command.
The generated executable can be found in the .secureprovisioning folder inside the project.
After successful build, debug or flash the application.
Building with additional images is supported for 118x targets. Although this capability is not included in the generic configuration, users can manually configure their projects to leverage the SEC Tool to generate bootable executables that include additional images.
To enable this, after building the project using SEC, you must update the project’s MCUX118x.json file located in the project_root_directory/.secureprovisioning folder. Add the following configuration to the “cli_args” section, updating the field values to match your project setup:
"--ele-firmware": "path to ele firmware image",
"--additional-images": {
  "images": [
    {
     "enabled": "yes",
      "entry_type": "general_image",
      "image_path": "path to additional image",
      "image_offset_int": "0x000FF000",
      "load_address_int": "0x28100000",
      "entry_point_int": "0x28100000",
      "target_address_int": "0x0",
      "image_type": "executable",
      "core_id": "core_1",
      "is_encrypted": "no",
      "container_set": "#1"
    }
  ]
}
i.MX95
Starting with MCUXpresso for VS Code 24.11.x, SEC features are used to generate bootable image using the needed additional images for the Cortex-M7 projects on i.MX95 target. Also, UUU (Universal Update Utility) tool will be used to debug the Cortex-M7 i.MX95 projects.
As a prerequisite, the board should be in serial download mode, boot from CM33, and an external MCU-Link or J-Link probe is connected to the JTAG port.
Import MCUXpresso SDK i.MX95 Cortex-M7 project and run the build project command.
It is expected that the build will fail the first time, as the needed information must be provided by the user as following:
Open the
additional_images_mx95_cm7_app_cfg.jsonfile that has been created in.secureprovisioningfolder inside the project folder.Edit the file to provide the correct paths for all the requested files listed in the json (DDR, TCM, system manager and ELE firmware). The paths can be relative to SEC workspace (the
.secureprovisioningfolder). Absolute paths and paths formed with user defined environment variables are also accepted.
Note: Do not change nor remove the cortex_m7_app and v2x_dummy entries.
The SEC and UUU used commands, commands output, as well as any errors that might be SEC and UUU related, will appear in MCUXpresso for VS Code Output console.
Build the project again and debug or flash the application.
Note: Debugging with J-Link requires a custom jlinkscript with the following implementation:
int InitTarget(void) {
    JLINK_SYS_Report("***************************************************");
    JLINK_SYS_Report("J-Link script: iMX95 initialization");
    JLINK_SYS_Report("***************************************************");

    // ********************************************************************
    JLINK_SYS_Report("... reset target via JTAG_ResetPin");
    JTAG_ResetPin = 0; JLINK_SYS_Sleep(100);
    JTAG_ResetPin = 1; JLINK_SYS_Sleep(100);
    JLINK_SYS_Report("... wait for target initialization after reset");
    JLINK_SYS_Sleep(6000);
    // ********************************************************************

    if (JLINK_ActiveTIF == JLINK_TIF_JTAG) {
        JLINK_SYS_Report("... JLINK_TIF_JTAG");
        JLINK_CORESIGHT_Configure("IRPre=0;DRPre=0;IRPost=4;DRPost=0;IRLenDevice=4");
    }
    else
    {
        JLINK_SYS_Report("... JLINK_TIF_SWD");
        JLINK_CORESIGHT_Configure("");
    }

    return 0;
}

void ResetTarget(void) {
    JLINK_TARGET_Halt(); // Make sure that the CPU is halted when reset is called
}