Run a flash target demo by UUU
This section describes the steps to use the UUU to build and run example applications provided in the MCUXpresso SDK. The hello_world demo application targeted for the i.MX 8M Nano EVK hardware platform is used as an example, although these steps can be applied to any example application in the MCUXpresso SDK.
Set up environment
This section contains the steps to install the necessary components required to build and run a MCUXpresso SDK demo application, as supported by the MCUXpresso SDK.
Download the MfgTool
The Universal Upgrade Utility (UUU) is an upgraded version of MfgTool. It is a command line tool that aims at installing the bootloader to various storage including SD, QSPI, and so on, for i.MX series devices with ease.
The tool can be downloaded from github. Use version 1.2.135 or higher for full support for the M7 image. Download uuu.exe for Windows OS, or download UUU for Linux. Configure the path so that the executable can later be called anywhere in the command line.
Parent topic:Set up environment
Switch to Download Mode
The board needs to be in Download Mode mode for UUU to download images:
Set the board boot mode to Download Mode [ SW1101:1000[1-4] ].
Connect the development platform to your PC via USB cable between the SERIAL port and the PC USB connector. The SERIAL port is J301 on the base board.
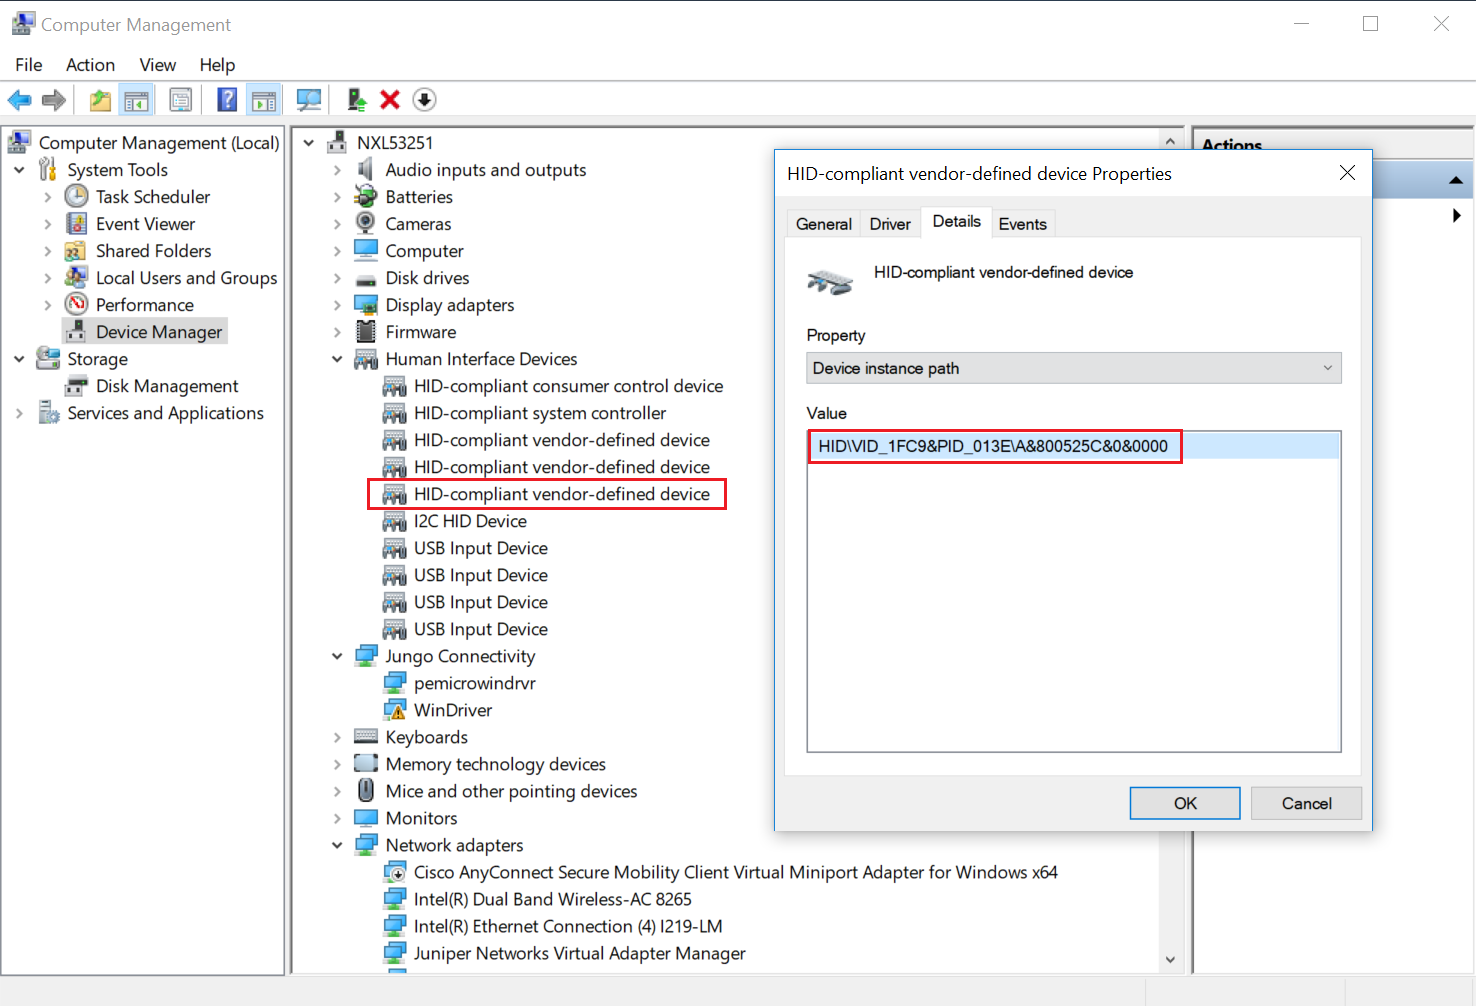
The PC recognizes the i.MX 8M Nano device as (VID:PID)=(1FC9:013E), as shown in Figure 1.
|
|
Parent topic:Set up environment
Parent topic:Run a flash target demo by UUU
Build an example application
The following steps guide you through opening the hello_world example application. These steps may change slightly for other example applications, as some of these applications may have additional layers of folders in their paths.
If not already done, open the desired demo application workspace. Most example application workspace files can be located using the following path:
<install_dir>/boards/<board_name>/<example_type>/<application_name>/iar
Using the i.MX 8M Nano EVK board as an example, the workspace is located in:
<install_dir>/boards/evkmimx8mn/demo_apps/hello_world/iar/hello_world.eww
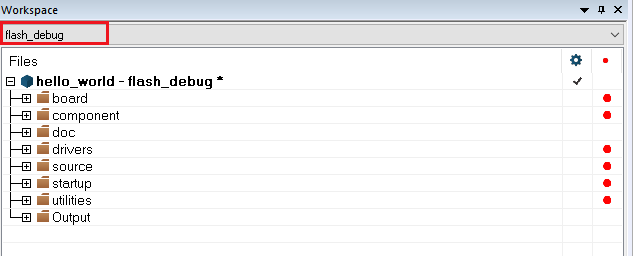
Select the desired build target from the drop-down. For this example, select hello_world – flash_debug.
|
|
To build the demo application, click Make, highlighted in red in Figure 2.
|

|
The build completes without errors.
Rename the generated
hello_world.bintom7_flash.bin, then copy it to the uuu tool directory.
Parent topic:Run a flash target demo by UUU
Run an example application
To download and run the application via UUU, perform these steps:
Connect the development platform to your PC via USB cable between the J901 USB DEBUG connector and the PC. It provides console output while using UUU.
Connect the J301 USB Type-C connector and the PC. It provides the data path for UUU.
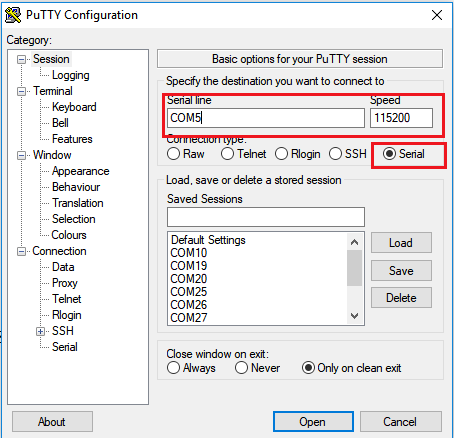
Open the terminal application on the PC, such as PuTTY or TeraTerm, and connect to the debug COM port (to determine the COM port number, see How to determine COM port). Configure the terminal with these settings:
115200 baud rate
No parity
8 data bits
1 stop bit |
|
Get the fspi version U-Boot image from release package and rename it to
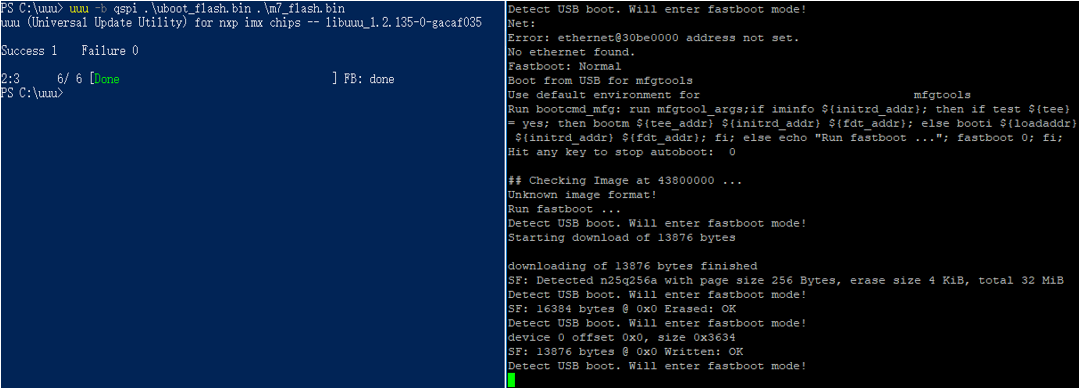
uboot_flash.bin.In the command line, execute uuu with the -b qspi switch:
uuu -b qspi uboot_flash.bin m7_flash.bin.The UUU puts the platform into fast boot mode and automatically flashes the target bootloader to QSPI. The command line and fast boot console is as shown in Figure 2.
|
|
Then, power off the board and change the boot mode to
MicroSD Mode [SW1101:1100[1-4]], and power on the board again.|

|
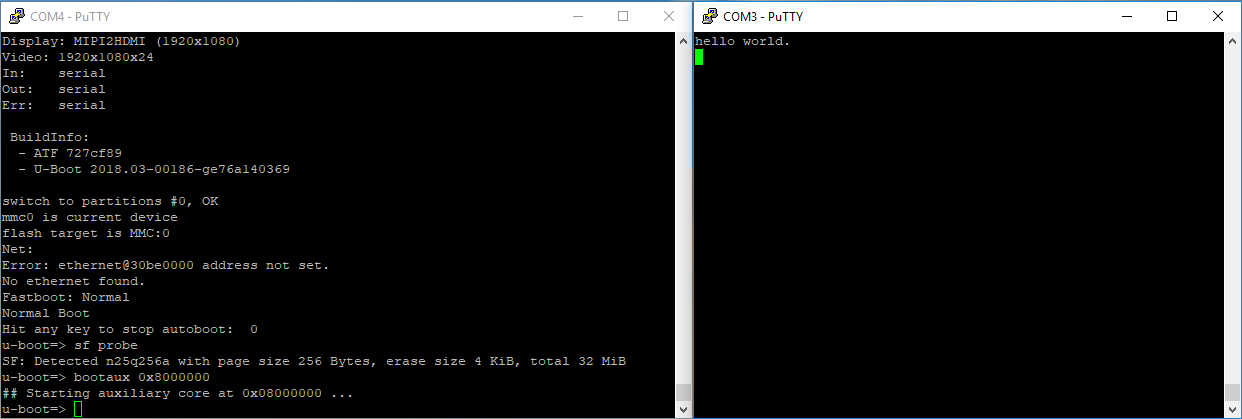
Use following command in U-Boot to kickoff m7:
sf probe
sf read ${loadaddr} 0 4
bootaux 0x8000000
|
|
Parent topic:Run a flash target demo by UUU