MCUboot and OTA update by using SB3 file
The secure binary (SB) container in version 3.1 provides an alternative way to encapsulate the mcuboot image. This provides a secure and easy way to use hardware security features of a device to securely transport an OTA update regardless security of transport channel.
For demonstration purpose ota_mcuboot_basic demo for selected boards provides additional command xmodem_sb3 to receive and process the SB3 file.
Risks and flash remapping functionality
For more information, please read Flash remapping functionality.
Several NXP devices has flash remapping enabled by default, however, there are few things to keep in mind when using SB3 as an OTA update.
User has to ensure that the downloaded SB3 has correct load address targeting currently inactive image slot because an active application has no control over ROM IAP handling SB3. This creates a risk with overwriting active slot leading to bricked device if an incorrect SB3 is downloaded and no backup image is present in the inactive slot to recover.
That means two separate SB3 files has to be generated if flash remap based on overlay is used and the application has to distinguish these two binaries during an OTA update. In case of flash remap based on swap mechanism the SB3 is always generated for secondary slot.
Step-by-step demonstration
In this walkthrough, if possible, the lifecycle of device is not changed for development purpose, so the device can be restored to its initial state. In real scenarios, transition the chips to the corresponding lifecycle is based on the requirements.
1. Provision the device and download the bootloader
The device must be provisioned to support SB3 processing. To simplify the workflow, the MCUXpresso Secure Provisioning Tool (SEC tool) is used.
To provision the device and download the bootloader, open the SEC tool, select target device and perform the following steps:
Erase the device
Build
mcuboot_opensourceprojectGet the device into ISP mode - typically on development boards hold the ISP button and press the reset button
Open the SEC tool and create new workspace for target device
Select binary or linkable file of
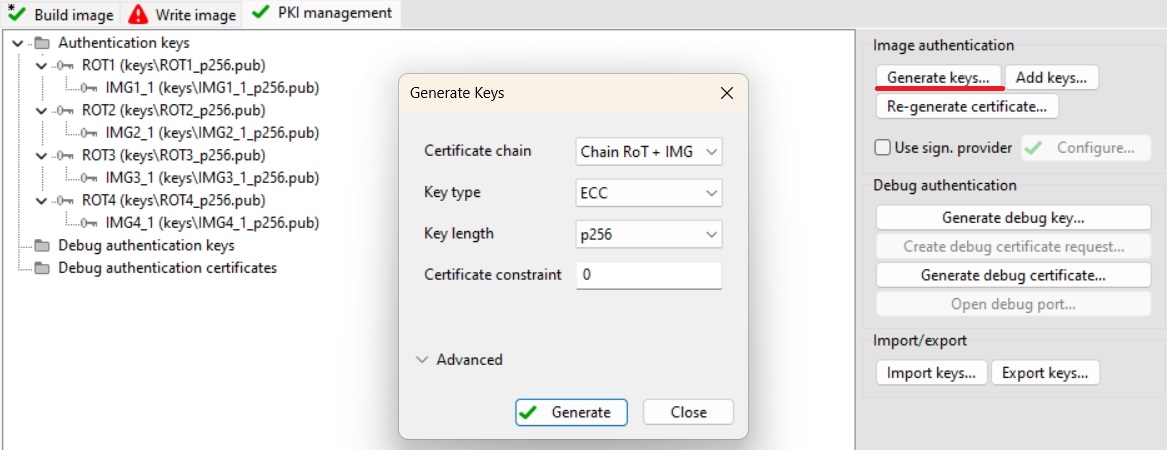
mcuboot_opensourceas Source executable imageSwitch to PKI management tab
Click Generate keys (leave default settings)
Following steps depends on target device:
1.1 RW61x
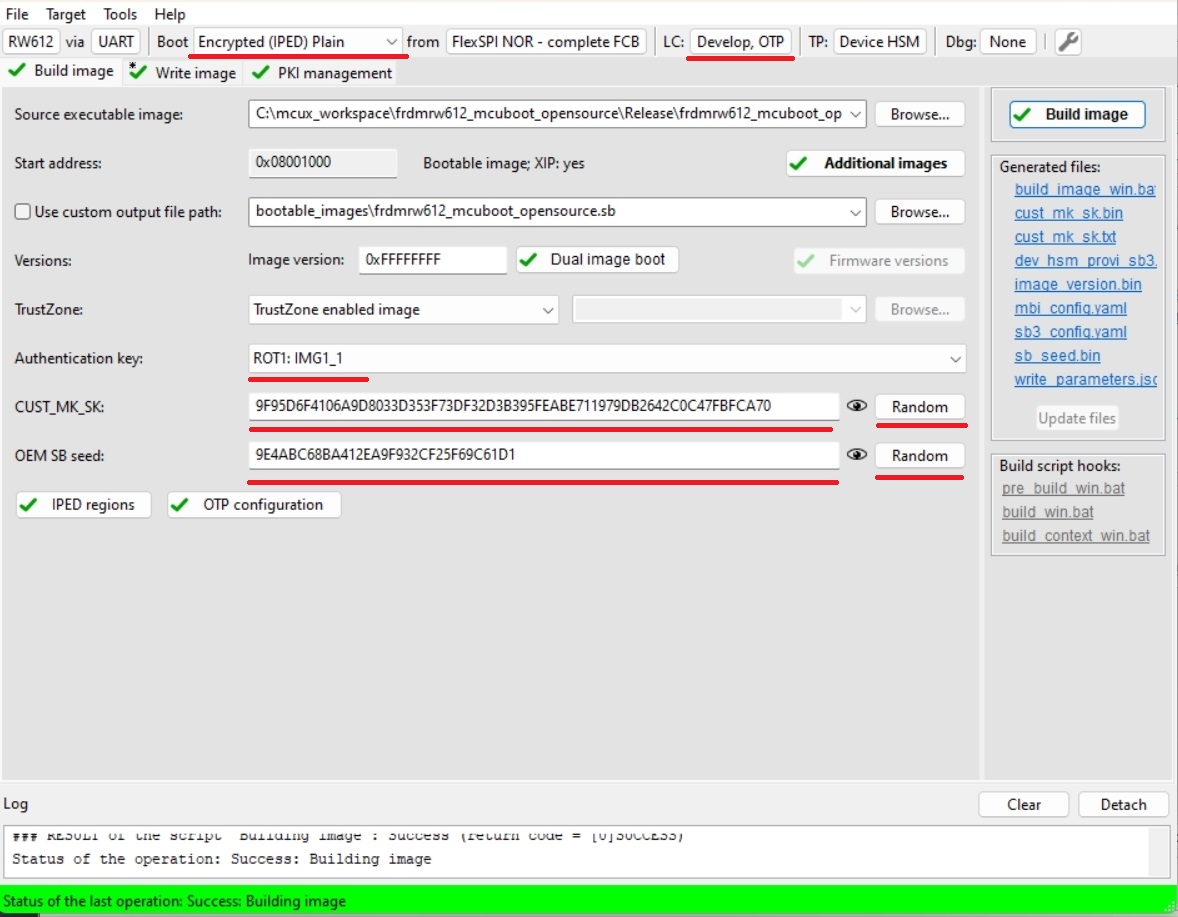
RW61x doesn’t properly support shadow registers to process SB3 files so the correct RKTH and CUST_MK_SK has to be provisioned. To provision these keys and keep the device in Develop lifecycle we will initially use Encrypted (IPED) Plain boot type. This initial operation provisions the device with RTKH and CUST_MK_SK permanently but the board will be still usable for development purpose. User is advised to save SEC tool workspace (or atleast the keys) for future use.
Build Image tab
Boot: Encrypted (IPED) Plain
Lifecycle: Develop, OTP
Select an authentication key and generate CUST_MK_SK and OEM SB seed
Click Build image
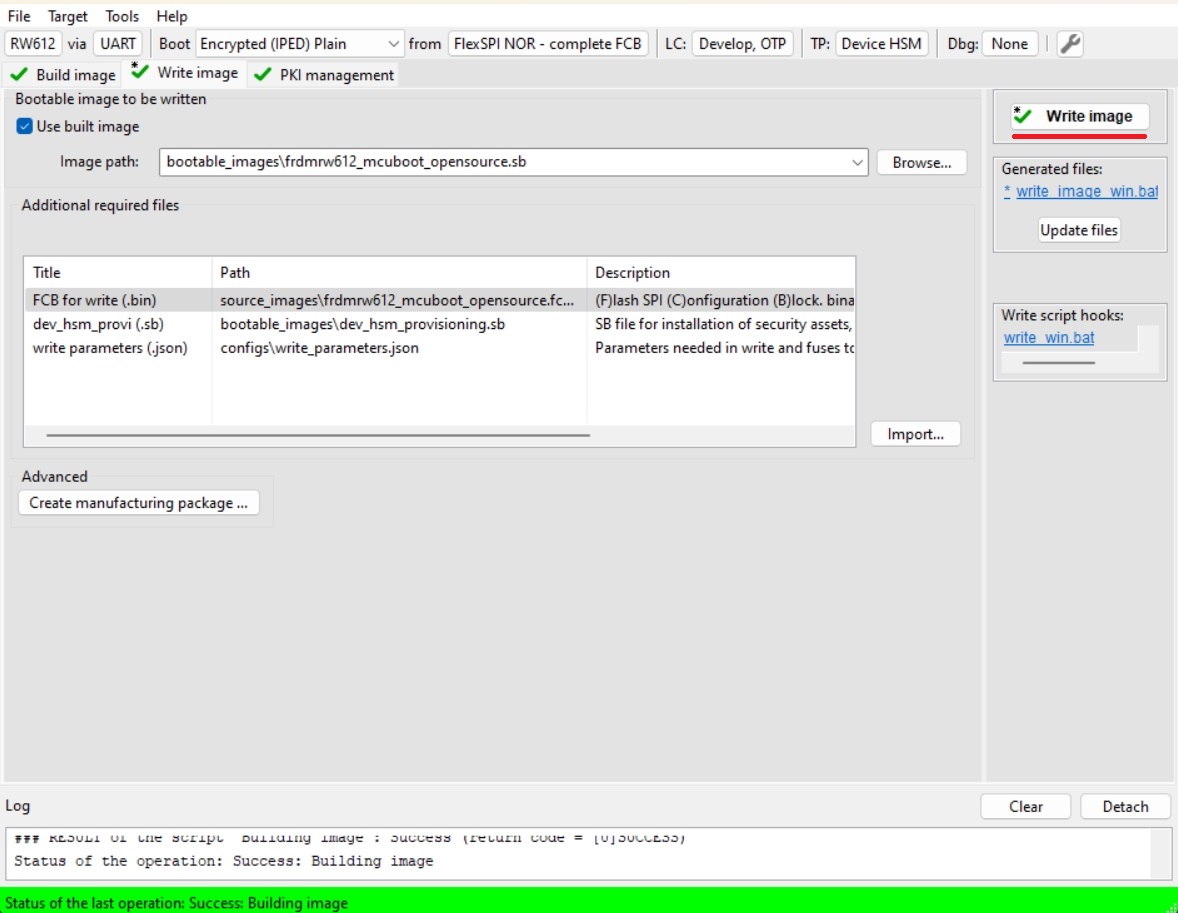
Write image tab
Click Write image
Now the device is provisioned without transition of the lifecycle.
Erase flash again and load unencrypted and unsigned
mcuboot_opensourceto the device using a programmer as usual
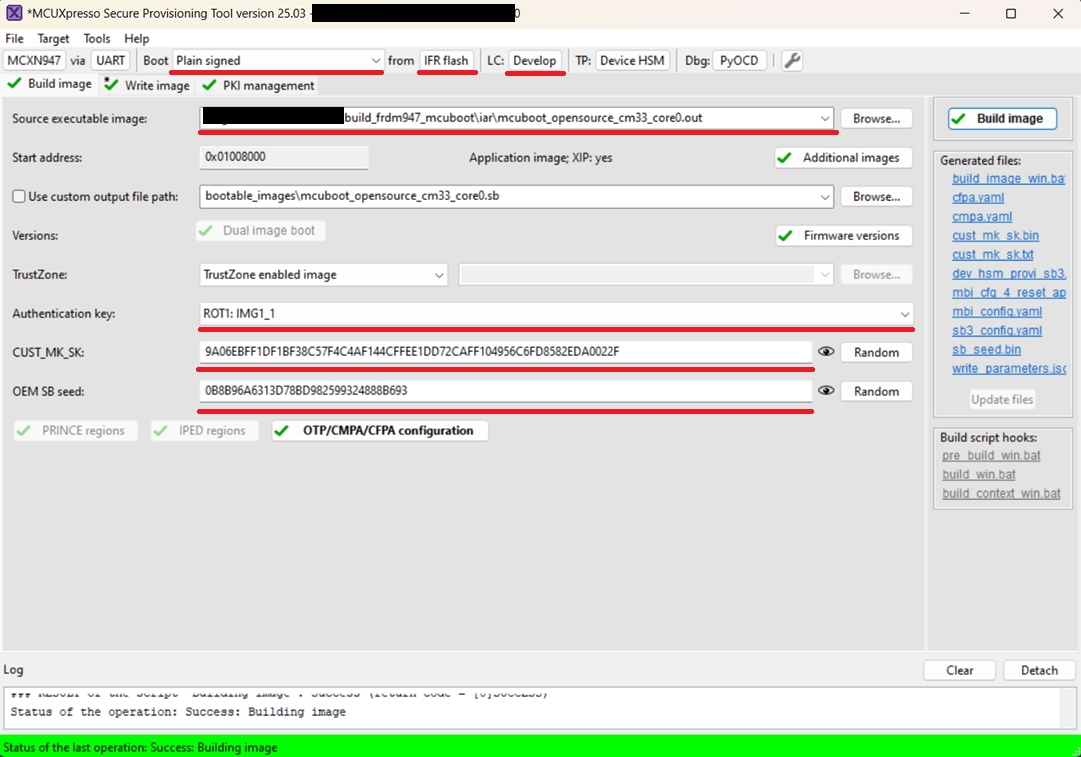
1.2 MCXN
Build Image
Boot: Plain signed from IFR/Onchip flash based on
mcuboot_opensourcelocationLifecycle: Develop
Select an authentication key and generate CUST_MK_SK and OEM SB seed
Click Build image
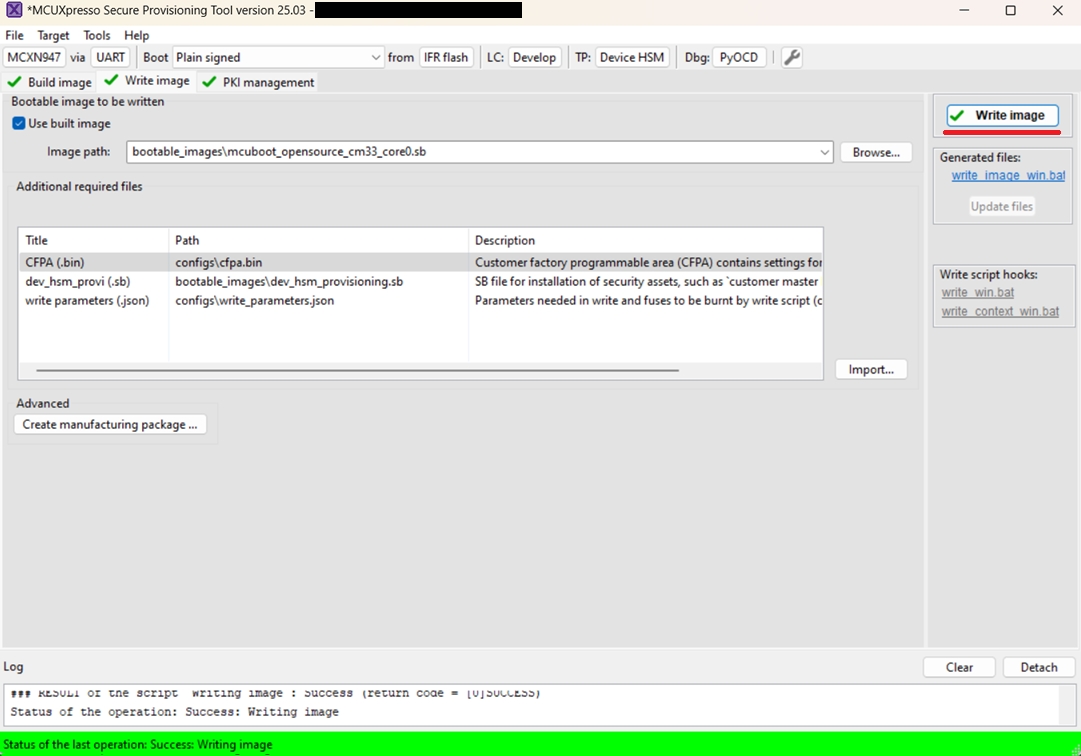
Write image tab
Click Write image
2. Prepare OTA images
Build
ota_mcuboot_basicand sign image byimgtoolas usual by following steps in specificexample_board_readme.mdfor your board. Copy the signed binary to your $sec_tool_workspace/source_imagesLook into cfg_templates directory and copy SB3 configuration templates for your device to your $sec_tool_workspace/configs
RW61x:
sb3_config_rw612_primary_slot.yamlfor primary slot,sb3_config_rw612_secondary_slot.yamlfor secondary slotMCXN:
sb3_config_mcxn_secondary_slot.yaml
Note: As mentioned we have to generate two versions of SB3 file for primary and secondary slot if we use flash remapping feature based on overlay mechanism. This is not needed if your device has flash remap based on swap or mcuboot is configured to use swap/overwrite update mode - the SB3 file always loads payload to secondary (inactive) slot.
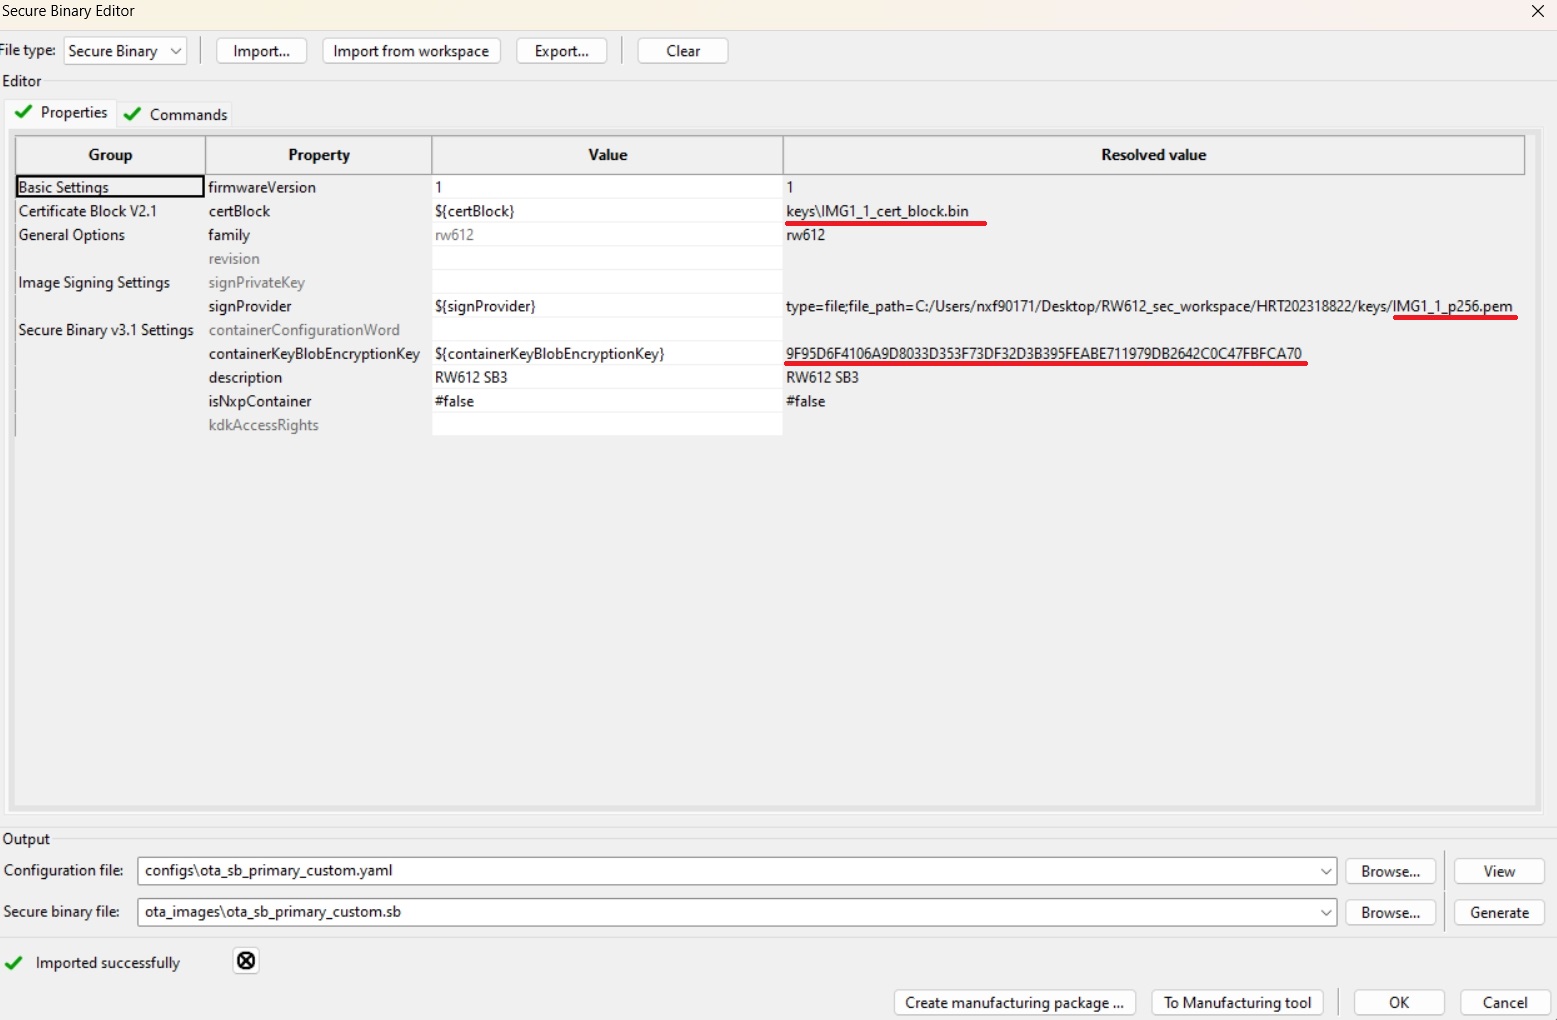
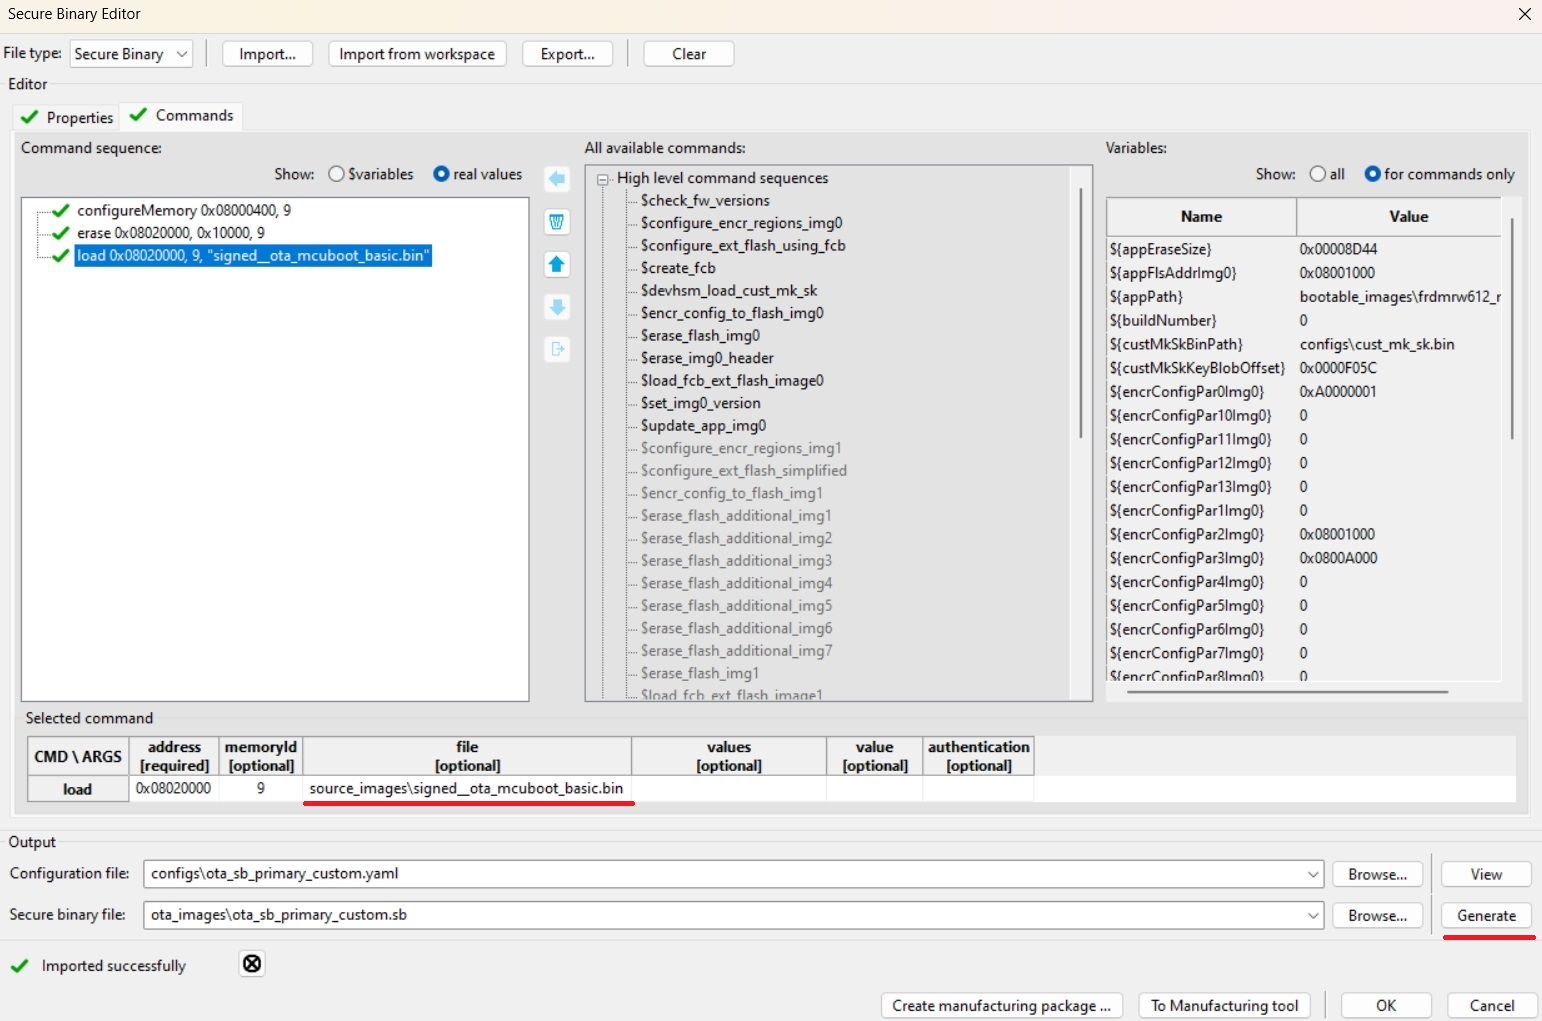
In SEC tool open Tools/SB Editor and click Import to import SB3 configuration template for secondary(candidate) slot
Check and eventually fix paths to keys and image binary
click Generate
Following pictures are examples for RW61x device
(Devices with flash remap overlay) Repeat 3th step for primary slot
Note: Optionally, we can also create initial SB3 file containing initial (first) ota_mcuboot_basic application for primary/secondary slot (generated with additional --pad --confirm imgtool arguments) to simulate manufacturing process, otherwise the initial signed image can be also loaded directly using ISP or other preferred method as usual.
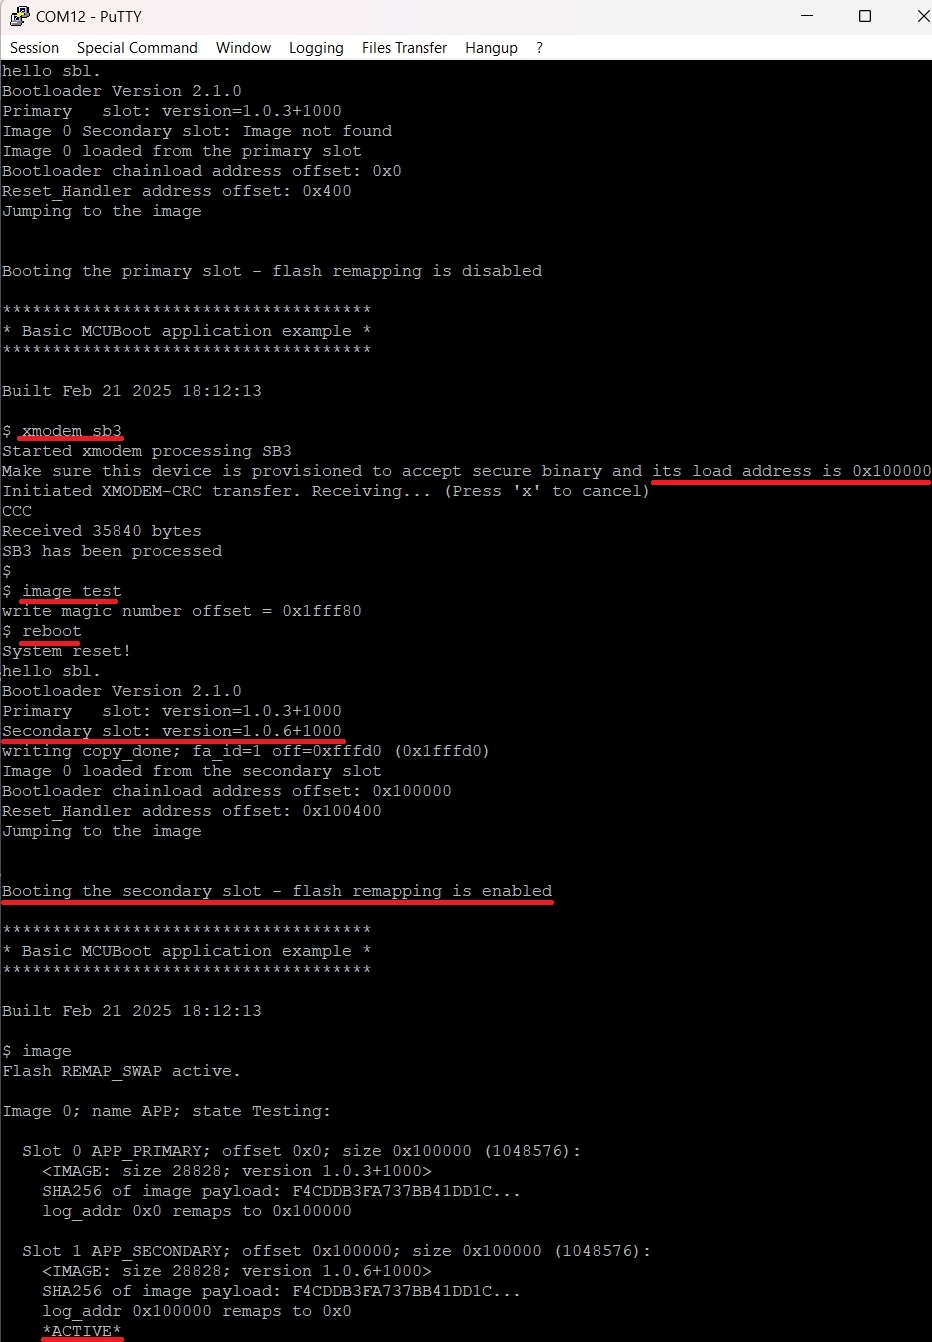
3. Firmware update
For demonstration purpose we use ExtraPutty tool as this fork of classic Putty has XMODEM support. Alternatively TeraTerm can be used.
Load and run initial
ota_mcuboot_basicapplication as usual - alternatively load initial SB3 viablhostandreceive-sb-filecommand.
Run
xmodem_sb3commandSend a SB3 file via Files Transfer/Xmodem (1k)
(Devices with flash remap overlay) Make sure the selected SB3 targets inactive slot otherwise the device can be bricked
Mark written signed image as ready for install by
image testcommandReboot