
Run a demo application using IAR#
This document uses EVKRT1170 EdgeFast Open Bluetooth API example to describe the steps to open a project, build an example, and run a project. For details, see Section 3 in Getting Started with MCUXpresso SDK User’s Guide(document MCUXSDKGSUG) atroot/docs/Getting Started with MCUXpresso SDK.pdf.
Open an IAR example#
For the IAR Embedded Workbench, unpack the contents of the archive to a folder on a local drive.
The example projects are available at:
<root>/boards/evkbmimxrt1170/edgefast_open_examples/peripheral_ht/iarOpen the IAR workspace file. For example, the highlighted *.eww format file
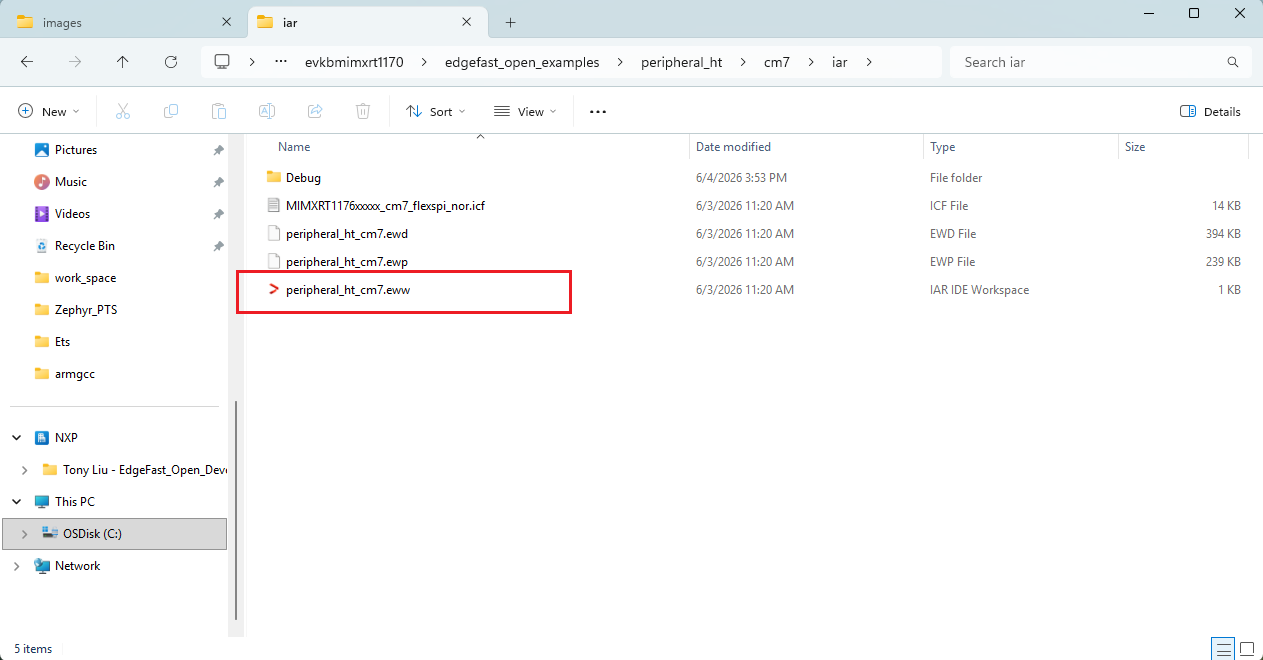
Parent topic:Run a demo application using IAR
Build an IAR example#
Select
flexspi_nor_debugorflexspi_nor_releaseconfigurations from the drop-down selector above the project tree in the workspace.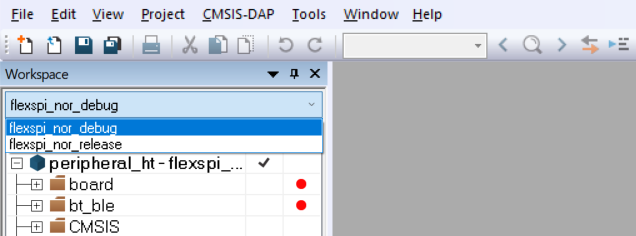
Build the EdgeFast Open Bluetooth project.
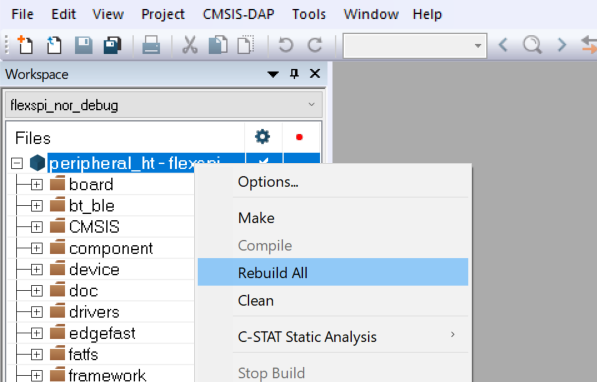
Note: Wireless module does not have flash hardware and requires 512 KB image loaded from board (such as RT1170) on system startup. The 512 KB image is kept on RT1170 side and only
flexspi_nor targetis supported for Bluetooth examples. Other targets are not supported because memory size limit.
Parent topic:Run a demo application using IAR
Run an IAR example#
This document uses the peripheral_ht as an example to describe the steps to run an example. For details on other projects and compilers, see the readme file in the corresponding example directory.
The following figure shows the connection of RT1170 and the M.2 wireless module.
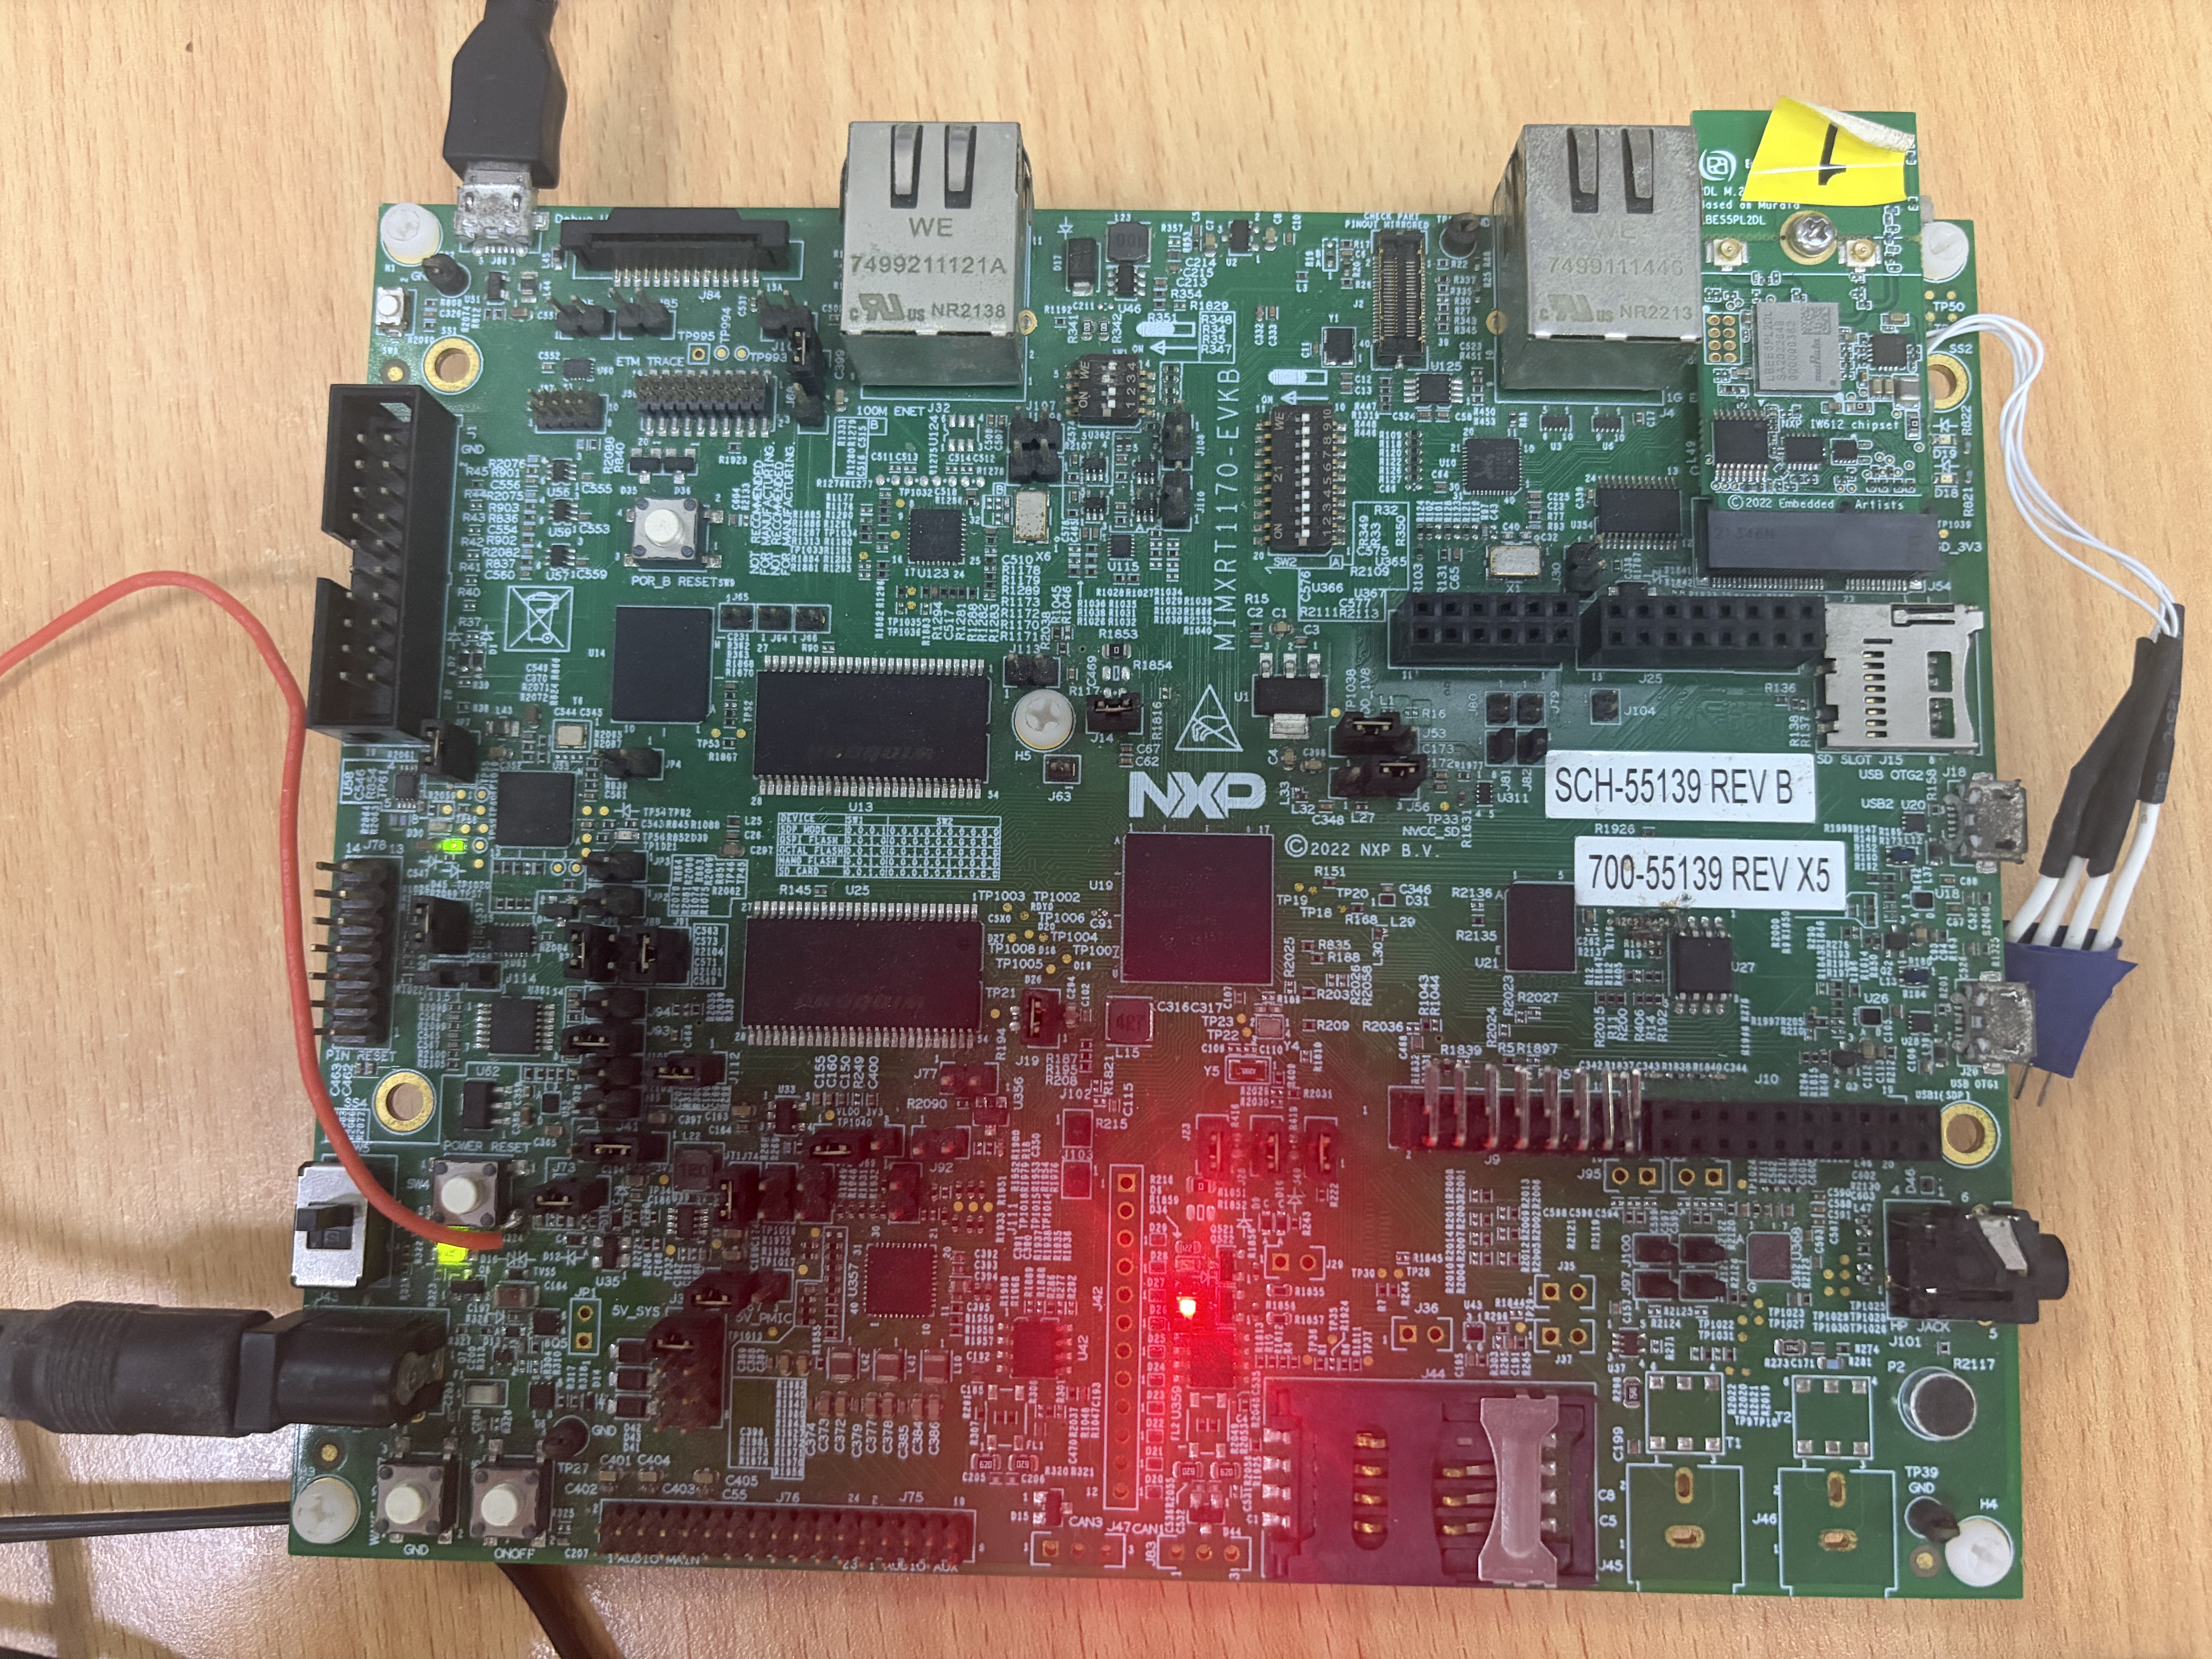
Connect the USB debug console port to PC.
Connect a 5 V power source to the J1 jack in the Wireless module board.
Make the appropriate debugger settings in the project options window, as shown in the figure below.
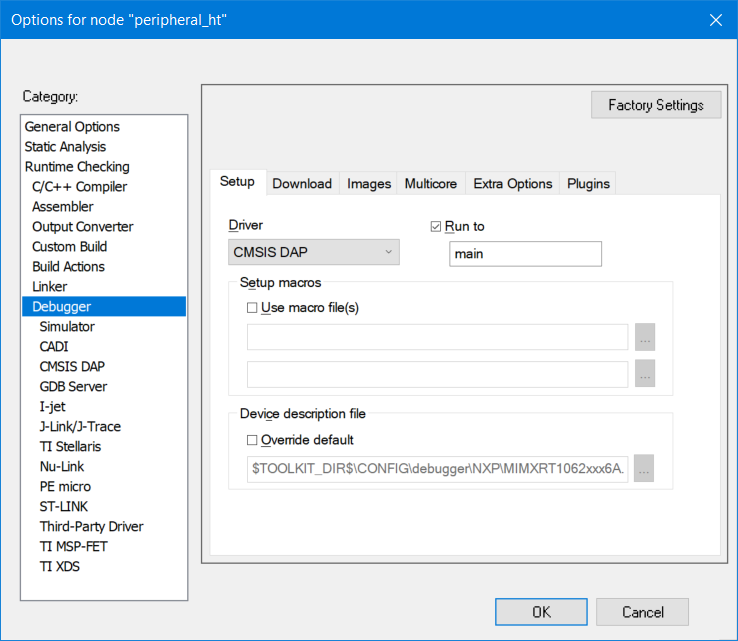
Click the Download and Debug button to flash the executable onto the board, as shown in the following figure. After the download is complete, if you must test the function of HFP, stop IAR debugging, and then connect the PCM interface. Reset the target board by manually.

Linker layer (LL) Firmware running in wireless module loads from EVKRT1170 by UART interface, so need take a bit time to download the LL firmware, For details, see readme.txt.
Note: The projects are configured to use “CMSIS DAP” as the default debugger. Ensure that the OpenSDA chip of the board contains a CMSIS. DAP firmware or that the debugger selection corresponds to the physical interface used to interface to the board.
Parent topic:Run a demo application using IAR
Parent topic:Demo