i.MX vSLAM demo#
1. Introduction#
The i.MX vSLAM (Visual Simultaneous Localization and Mapping) demo demonstrates real-time visual SLAM capabilities on NXP’s i.MX platform using an Intel RealSense D455 depth camera. This demo showcases how to build a map of an unknown environment while simultaneously tracking the camera’s position within that map.
The demo leverages NXP’s optimized SLAM libraries and integrates with ROS 2 for robotics applications, making it ideal for autonomous navigation and robotics research.
Key features:
Real-time visual SLAM using RGB-D camera
Hardware-accelerated processing on i.MX 95 MPU
ROS 2 integration for robotics workflows
3D visualization with Pangolin (on-board) and RViz2 (on PC)
Support for loop closure detection
Map saving and loading capabilities
Hardware:
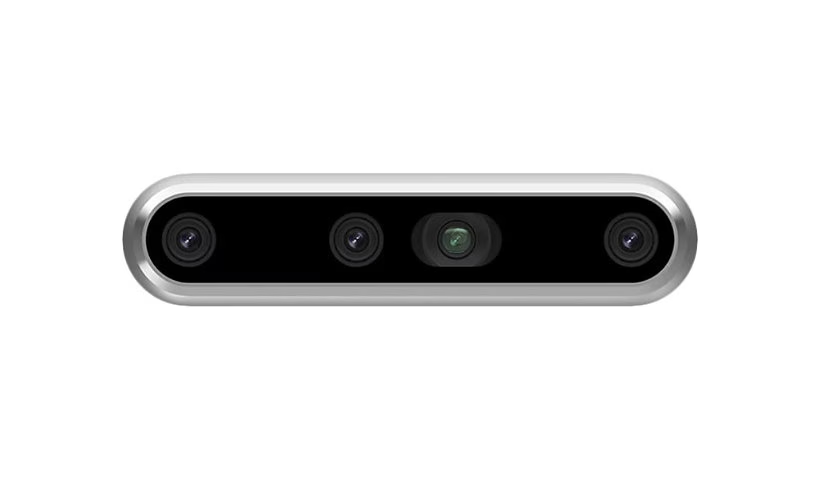
Intel RealSense D455: RGB-D camera with wide field of view and long-range depth sensing
NXP i.MX board: High-performance applications processor with AI acceleration
Ubuntu PC: For RViz2 visualization and monitoring
The following figure shows the Intel RealSense D455 camera:
Note: This article uses the i.MX95 EVK board as an example.
2. System architecture#
2.1 High-level architecture#
        flowchart TD
    subgraph Hardware
        A1[Intel RealSense D455]
        A2[i\.MX 95 EVK]
    end
    subgraph ROS2_on_iMX95
        B1[realsense2_camera]
        B2[imx_vslam_node]
        B3[Pangolin Viewer]
    end
    subgraph SLAM_Components
        C1[imx-hc-slam
        SLAM Core Library]
        C2[imx-mv
        Machine Vision]
        C3[Sophus
        Lie Groups]
    end
    subgraph PC_Ubuntu
        D1[RViz2]
        D2[ROS 2 Jazzy]
    end

    A1 -->|USB 3.0| A2
    A2 --> B1
    B1 -->|RGB-D Images| B2
    B2 --> C1
    C1 --> C2
    C1 --> C3
    B2 -->|Pose/Map Data| B3
    B2 -->|ROS 2 Topics| D1
    D1 --> D2
2.2 Network topology#
        flowchart LR
    subgraph Network[Local Network 192.168.1.0/24]
        IMX[i\.MX 95 EVK
        192.168.1.95]
        PC[Ubuntu PC
        192.168.1.1]
    end

    IMX <-->|Ethernet| PC
    IMX <-.->|ROS 2 DDS| PC
3. Software components#
3.1 Core libraries#
The vSLAM demo utilizes the following NXP-optimized libraries:
imx-hc-slam: High-performance SLAM core library optimized for i.MX processors
imx-mv (Machine Vision): Computer vision primitives optimized for i.MX hardware
Pangolin: Lightweight 3D visualization library
Sophus: C++ implementation of Lie groups (SO3, SE3)
3.2 ROS 2 packages#
realsense2_camera#
Description: ROS 2 wrapper for Intel RealSense SDK
Topics Published:
/camera/color/image_raw- RGB image/camera/depth/image_rect_raw- Depth image/camera/color/camera_info- Camera calibration/camera/aligned_depth_to_color/image_raw- Aligned depth
Repository: IntelRealSense/realsense-ros
imx-vslam-ros2-demo#
Description: ROS 2 node wrapping NXP’s vSLAM libraries
Topics Subscribed:
/camera/color/image_raw/camera/depth/image_rect_raw/camera/color/camera_info
4. Hardware setup#
4.1 Prerequisites#
Required Hardware:
NXP i.MX 95 EVK board
Intel RealSense D455 camera
USB 3.0 cable (USB-C to USB-A or USB-C to USB-C)
USB Type-C cable for debug UART
USB Type-C cable for power (with PD adapter)
Flashed microSD card (16 GB or above) with Robotics Edge Platform Image
Ubuntu PC (for RViz2 visualization)
Ethernet cables (for network connection)
Software prerequisites:
i.MX 95 EVK: Robotics Edge Platform image with vSLAM demo support
Pre-built image:
robotics-edge-image-full-jazzy-imx95evk.rootfs.wic.zst
Ubuntu PC: Ubuntu 22.04 LTS or later with ROS 2 Jazzy
4.2 Hardware connection diagram#
        flowchart TB
    subgraph Host_PC[Ubuntu PC - 192.168.1.1]
        PC[Development PC]
        RVIZ[RViz2]
    end

    subgraph i\.MX95_EVK[i\.MX 95 EVK - 192.168.1.95]
        UART[USB UART J31]
        USB[USB 2.0 J7]
        ETH[Ethernet J1]
    end

    subgraph Peripherals
        CAM[RealSense D455]
    end

    PC -->|USB-C Debug| UART
    PC <-->|Ethernet| ETH
    USB -->|USB| CAM
4.3 Connection steps#
1. Prepare the i.MX 95 EVK:
Insert the microSD card with Robotics Edge Platform image
Set boot switches for SD card boot (refer to board documentation)
2. Connect Debug UART:
Connect a USB Type-C cable from J31 (Debug UART) to your PC.
Open a serial terminal (115200 8N1).
3. Connect RealSense D455:
Connect the RealSense D455 to J7 (USB 2.0 port).
4. Connect to the Network:
Connect an Ethernet cable from J1 (i.MX 95 EVK) to your PC.
6. Power On:
Connect the power supply, then switch On.
The board boots automatically.
7. Verify Camera Connection:
After boot, log in and check if the camera is detected:
# Check USB devices
lsusb | grep Intel

# Expected output:
# Bus 001 Device 002: ID 8086:0b5c Intel Corp. Intel(R) RealSense(TM) Depth Camera 455
5. PC setup (Ubuntu)#
5.1 Install ROS 2 Jazzy on Ubuntu PC#
This section guides you through installing ROS 2 Jazzy on your Ubuntu PC for RViz2 visualization.
5.1.1 System requirements#
OS: Ubuntu 24.04 LTS (Jazzy)
Architecture: x86_64 (amd64)
RAM: 4 GB minimum (8 GB recommended)
5.1.2 Set Locale#
Ensure your locale supports UTF-8:
locale  # check for UTF-8

sudo apt update && sudo apt install locales
sudo locale-gen en_US en_US.UTF-8
sudo update-locale LC_ALL=en_US.UTF-8 LANG=en_US.UTF-8
export LANG=en_US.UTF-8

locale  # verify settings
5.1.3 Set up the sources#
1. Enable Ubuntu Universe repository:
sudo apt install software-properties-common
sudo add-apt-repository universe
2. Add ROS 2 GPG key:
sudo apt update && sudo apt install curl -y
export ROS_APT_SOURCE_VERSION=$(curl -s https://api.github.com/repos/ros-infrastructure/ros-apt-source/releases/latest | grep -F "tag_name" | awk -F\" '{print $4}')
curl -L -o /tmp/ros2-apt-source.deb "https://github.com/ros-infrastructure/ros-apt-source/releases/download/${ROS_APT_SOURCE_VERSION}/ros2-apt-source_${ROS_APT_SOURCE_VERSION}.$(. /etc/os-release && echo ${UBUNTU_CODENAME:-${VERSION_CODENAME}})_all.deb"
sudo dpkg -i /tmp/ros2-apt-source.deb
5.1.4 Install ROS 2 Jazzy#
1. Update package index:
sudo apt update
sudo apt upgrade
2. Install ROS 2 Jazzy Desktop (includes RViz2):
sudo apt install ros-jazzy-desktop
5.1.5 Set up the environment#
1. Source ROS 2 setup script:
source /opt/ros/jazzy/setup.bash
2. Add to bashrc for automatic setup:
echo "source /opt/ros/jazzy/setup.bash" >> ~/.bashrc
source ~/.bashrc
5.2 Configure the network for ROS 2 communication#
5.2.1 Network configuration overview#
For ROS 2 nodes on different machines to communicate, they must:
Be on the same network.
Use the same ROS_DOMAIN_ID.
Have proper firewall settings.
5.2.2 Configure the PC network interface#
1. Set ROS_DOMAIN_ID (must match i.MX 95 EVK):
export ROS_DOMAIN_ID=0
echo "export ROS_DOMAIN_ID=0" >> ~/.bashrc
2. Configure network interface:
Ensure your PC and i.MX 95 EVK are on the same network (for example, 192.168.1.0/24).
Check the IP address of your PC:
ip addr show
If needed, configure static IP:
# Example: Set eth0 to 192.168.1.10
sudo ip addr add 192.168.1.1/24 dev eth0
sudo ip link set eth0 up
3. Test connectivity:
# Ping i.MX 95 EVK
ping 192.168.1.95
4. Verify ROS 2 discovery:
After starting vSLAM demo on i.MX 95 EVK, check if topics are visible:
ros2 topic list
6. Network configuration#
6.1 Configure the i.MX 95 EVK network#
1. Log in to i.MX 95 EVK via serial console:
# Default credentials
Username: root
Password: (press Enter, no password by default)
2. Check the network interfaces:
ip addr show
3. Configure static IP for Ethernet:
# Set IP address
ifconfig eth0 192.168.1.95 netmask 255.255.255.0 up

# Or using ip command
ip addr add 192.168.1.95/24 dev eth0
ip link set eth0 up
4. Verify the network configuration:
ip addr show eth0
ping 192.168.1.1  # Ping Ubuntu PC
6.2 Configure ROS 2 Environment on i.MX 95 EVK#
1. Setup ROS 2 Environment:
source /opt/ros/jazzy/setup.bash
2. Set ROS_DOMAIN_ID:
export ROS_DOMAIN_ID=0
echo "export ROS_DOMAIN_ID=0" >> ~/.bashrc
3. Verify ROS 2 installation:
ros2 topic list
7. Running the vSLAM Demo#
7.1 Start vSLAM Demo on i.MX 95 EVK#
# SSH into i.MX 95 EVK or use serial console
ssh root@192.168.1.95

# Source ROS 2 environment
source /opt/ros/jazzy/setup.bash

# Launch vSLAM demo with RealSense D455
ros2 launch imx_vslam_ros2_demo imx_rgbd_d455.py
7.2 Visualize on Ubuntu PC with RViz2#
On Ubuntu PC:
1. Setup the ROS 2 environment:
source /opt/ros/jazzy/setup.bash
2. Verify that topics are visible:
ros2 topic list
You should see topics from i.MX 95 EVK:
/camera/camera/aligned_depth_to_color/camera_info
/camera/camera/aligned_depth_to_color/image_raw
/camera/camera/color/camera_info
/camera/camera/color/image_raw
/camera/camera/color/metadata
/camera/camera/depth/camera_info
/camera/camera/depth/image_rect_raw
/camera/camera/depth/metadata
/camera/camera/extrinsics/depth_to_color
/camera/camera/extrinsics/depth_to_depth
/camera_path
/clicked_point
/goal_pose
/initialpose
/map_pointcloud2
/parameter_events
/rosout
/tf
/tf_static
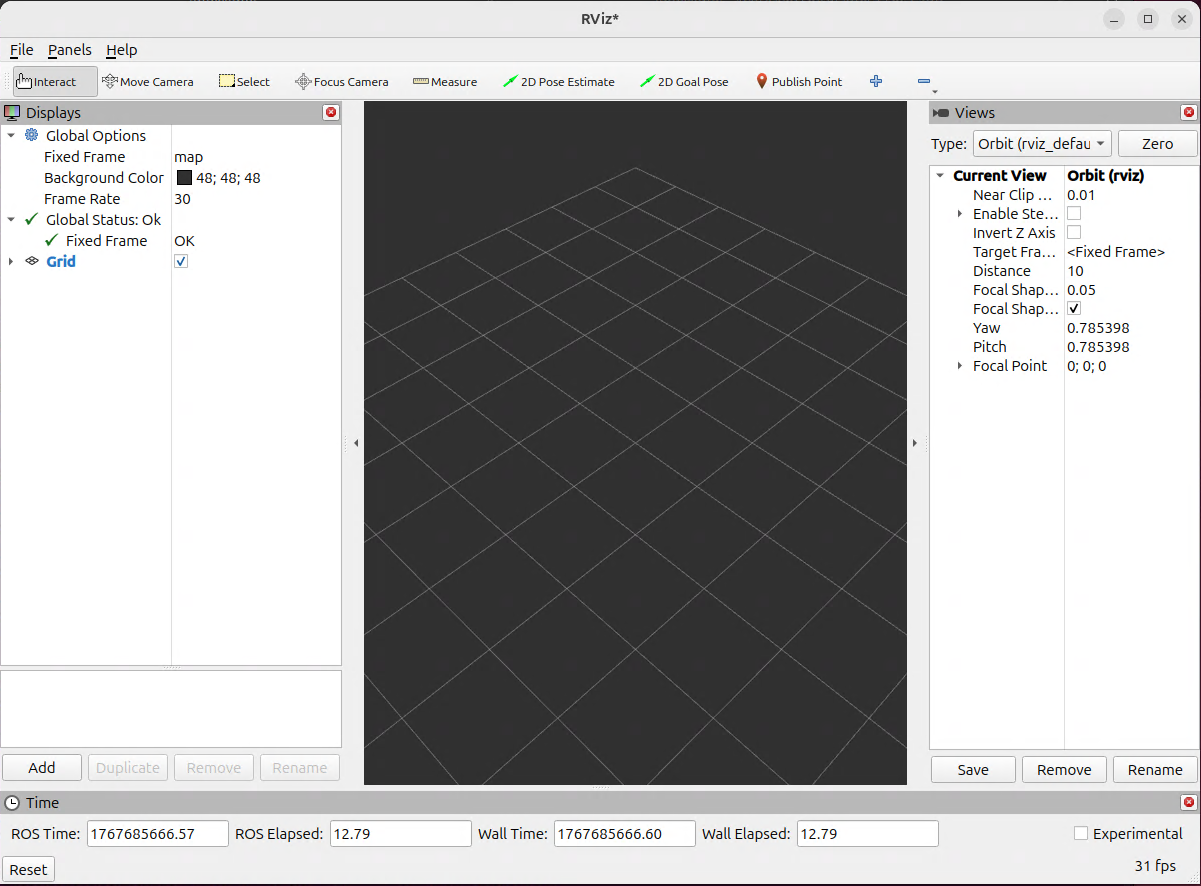
3. Launch RViz2:
ros2 run rviz2 rviz2
4. Load the saved configuration:
Download the configuration file
Download the RViz configuration file imx-vslam-ros2-demo.rviz
wget https://raw.githubusercontent.com/nxp-imx/meta-robotics-edge/walnascar/recipes-demo/imx-vslam-ros2-demo/files/rviz2/imx-vslam-ros2-demo.rviz
Load configuration
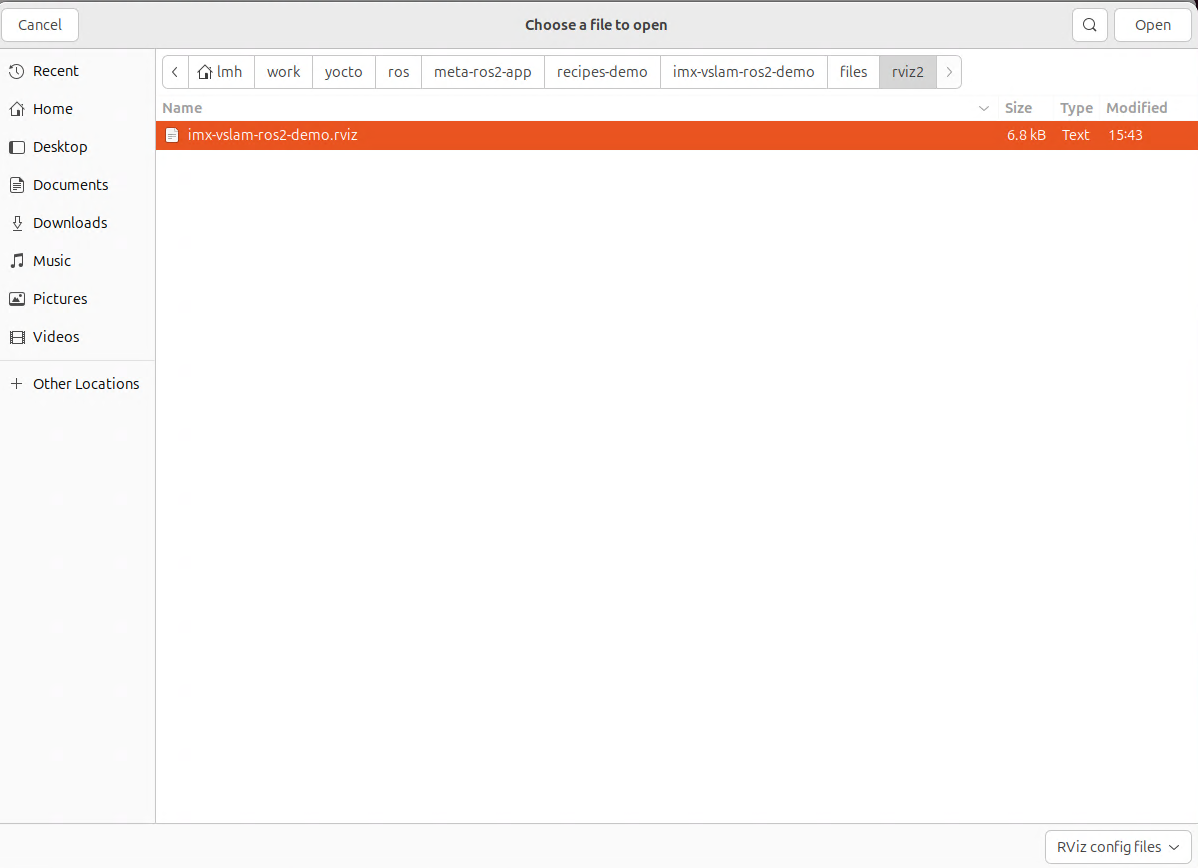
Open the File menu, then click Open Config.
Select the imx-vslam-ros2-demo.rviz configuration file and click Open.
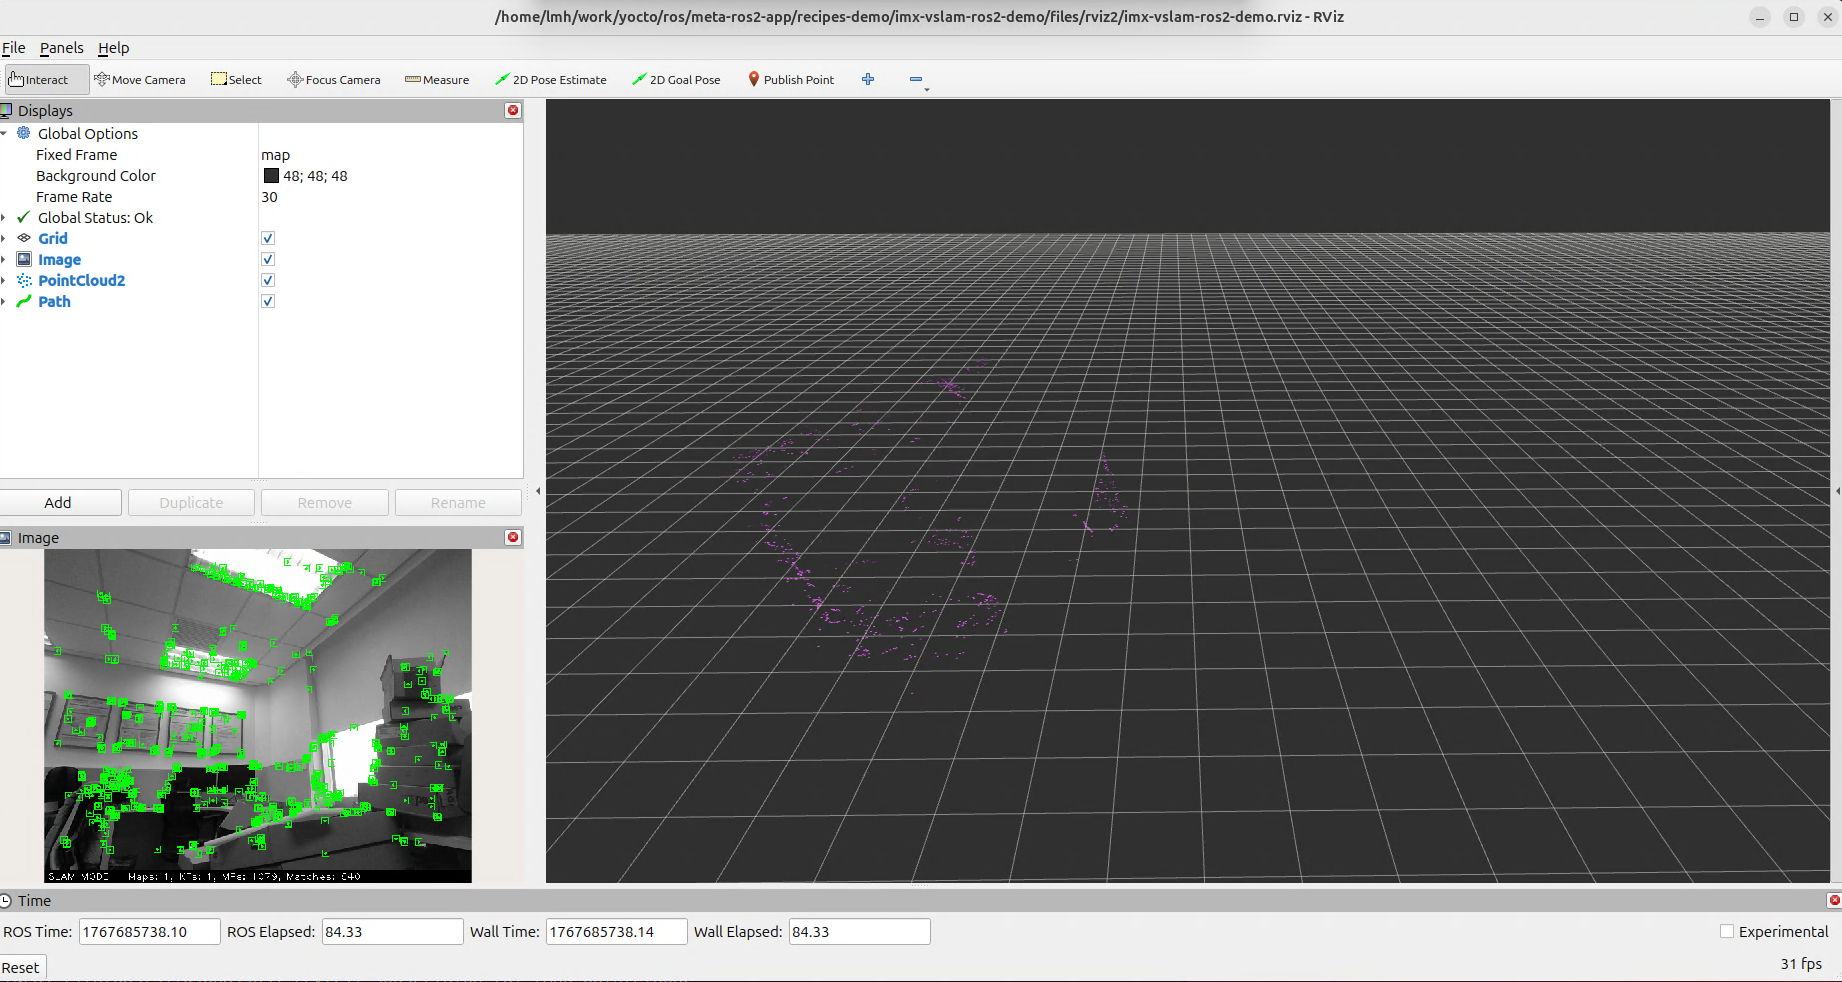
The figure below shows a successful configuration.