
Run a demo application using IAR#
Note:
When erasing flash on IAR, IAR will show all range that can connect to flash. Please only check address flash connect to practically. Take the frdmimxrt1152 for example:
M7: 0x30000000-0x33ffffff
When using IAR download/debug flexspi_nor related targets, make sure the boot switch is put to internal flash boot mode SW1[1:4]:0010
This section describes the steps required to build, run, and debug example applications provided in the MCUXpresso SDK. The hello_world demo application targeted for the FRDM-IMXRT1152 hardware platform is used as an example, although these steps can be applied to any example application in the MCUXpresso SDK.
Build an example application#
Do the following steps to build the hello_world demo application.
Open the desired demo application workspace. Most example application workspace files can be located using the following path:
<install_dir>/boards/<board_name>/<example_type>/<application_name>/iar
Using the FRDM-IMXRT1152 hardware platform as an example, the
hello_worldworkspace is located in:<install_dir>/boards/frdmimxrt1152/demo_apps/hello_world/iar/hello_world.eww
Other example applications may have additional folders in their path.
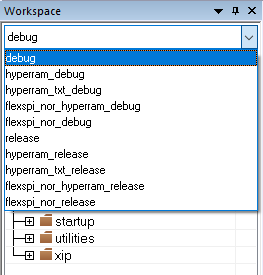
Select the desired build target from the drop-down menu.
There are twelve project configurations (build targets) supported across MCUXpresso SDK projects:
Debug– Compiler optimization is set to low, and debug information is generated for the executable. The linker file isRAMlinker, where text and data section is put in internal TCM.Release– Compiler optimization is set to high, and debug information is not generated. The linker file isRAMlinker, where text and data section is put in internal TCM.ram_0x1400_debug– Project configuration is same as the debug target. The linker file isRAM_0x1400linker, where text is put in ITCM with offset 0x1400 and data put in DTCM.ram_0x1400_release– Project configuration is same as the release target. The linker file isRAM_0x1400linker, where text is put in ITCM with offset 0x1400 and data put in DTCM.hyperram_debug– Project configuration is same as the debug target. The linker file ishyperramlinker, where text is put in internal TCM and data put in hyperram.hyperram_release– Project configuration is same as the release target. The linker file ishyperramlinker, where text is put in internal TCM and data put in hyperram.hyperram_txt_debug– Project configuration is same as the debug target. The linker file ishyperram_txtlinker, where text is put in hyperram and data put in OCRAM.hyperram_txt_release– Project configuration is same as the release target. The linker file ishyperram_txtlinker, where text is put in hyperram and data put in OCRAM.flexspi_nor_debug– Project configuration is same as the debug target. The linker file isflexspi_norlinker, where text is put in flash and data put in TCM.flexspi_nor_release– Project configuration is same as the release target. The linker file isflexspi_norlinker, where text is put in flash and data put in TCM.flexspi_nor_hyperram_release- Project configuration is same as the release target. The linker file isflexspi_nor_hyperramlinker, where text is put in flash and data put in hyperram.flexspi_nor_hyperram_debug– Project configuration is same as the debug target. The linker file isflexspi_nor_hyperramlinker, where text is put in flash and data put in hyperram. For some examples need large data memory, onlyhyperram_debugandhyperram_releasetargets are supported. For this example, select hello_world – debug.
To build the demo application, click Make, highlighted in red in Figure 2.
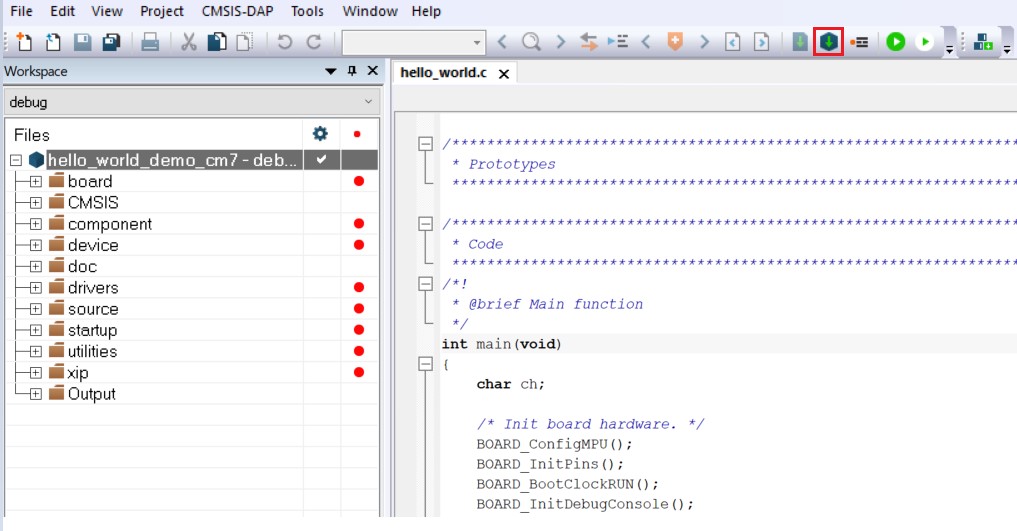
The build completes without errors.
Parent topic:Run a demo application using IAR
Run an example application#
To download and run the application, perform these steps:
This board supports the CMSIS-DAP/mbed/DAPLink debug probe by default. Visit MBED and follow the instructions to install the Windows® operating system serial driver. If running on Linux OS, this step is not required.
Connect the development platform to your PC via USB cable. Connect the USB cable to J11 and make sure SW1[1:4] is 0010b.
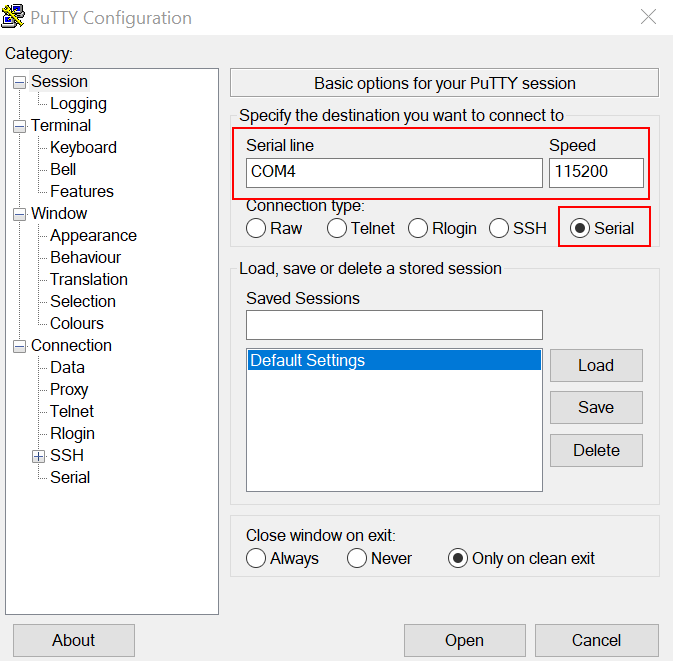
Open the terminal application on the PC, such as PuTTY or TeraTerm, and connect to the debug COM port (to determine the COM port number, see How to determine COM port). Configure the terminal with these settings:
115200 or 9600 baud rate, depending on your board (reference
BOARD_DEBUG_UART_BAUDRATEvariable in the board.hfile)No parity
8 data bits
1 stop bit
In IAR, click the Download and Debug button to download the application to the target.

If debugging with J-Link as the probe, a
jlinkscriptfile is needed. Select J-Link/J-Trace as the driver and uncheck Use macro file(s), as shown in Figure 3.
Then check Use command line options, as shown in Figure 4, and set the command line option:
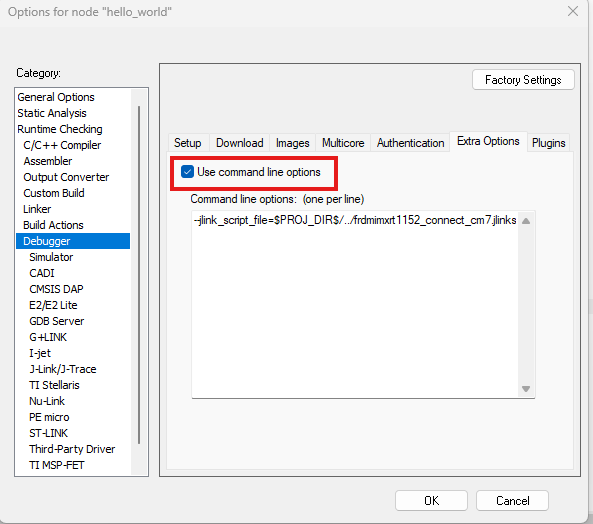
--jlink_script_file=$PROJ_DIR$/../frdmimxrt1152_connect_cm7.jlinkscript
The application is then downloaded to the target and automatically runs to the
main()function.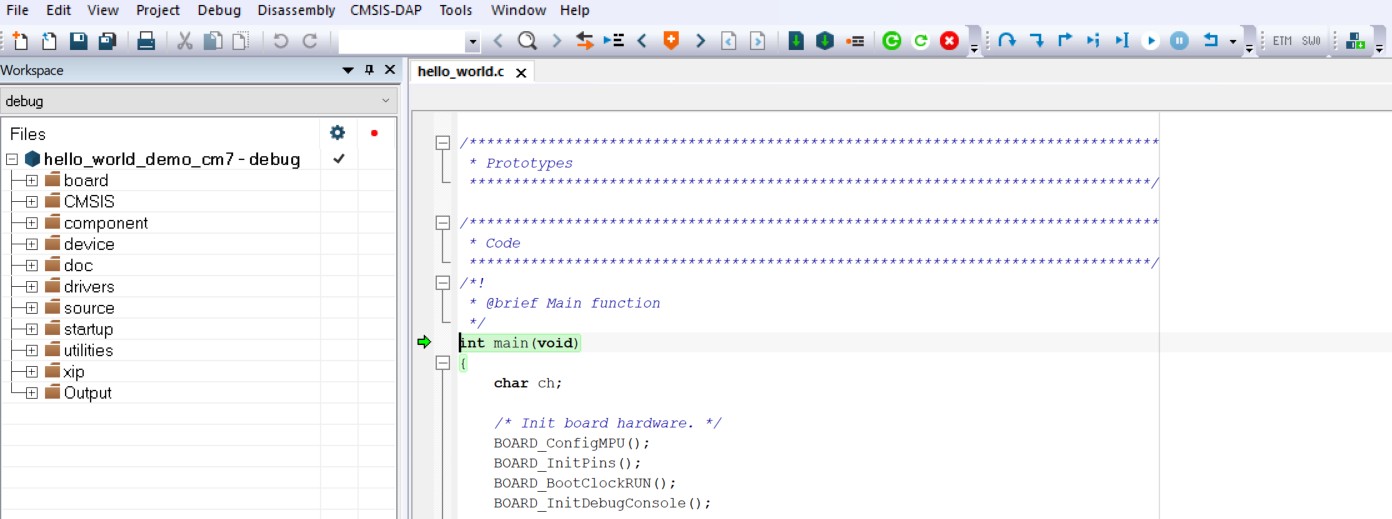
Run the code by clicking the Go button to start the application.

The
hello_worldapplication is now running and a banner is displayed on the terminal. If this is not true, check your terminal settings and connections.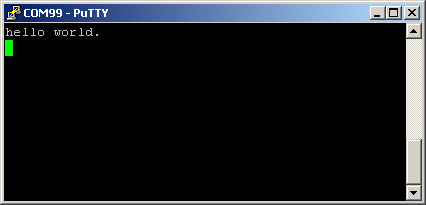
Note: There are some limitations on MCUXpresso IDE debugging. For details, see Section 8.6 IAR debug limitation in MCUXpresso SDK Release Notes for FRDM-IMXRT1152.
Parent topic:Run a demo application using IAR