
Wireless ranging demo application setup#
This chapter provides information about hardware and software setup.
Hardware set up with single antenna configuration#
Prerequisites
Two boards (ranging service client and ranging service server)
PC
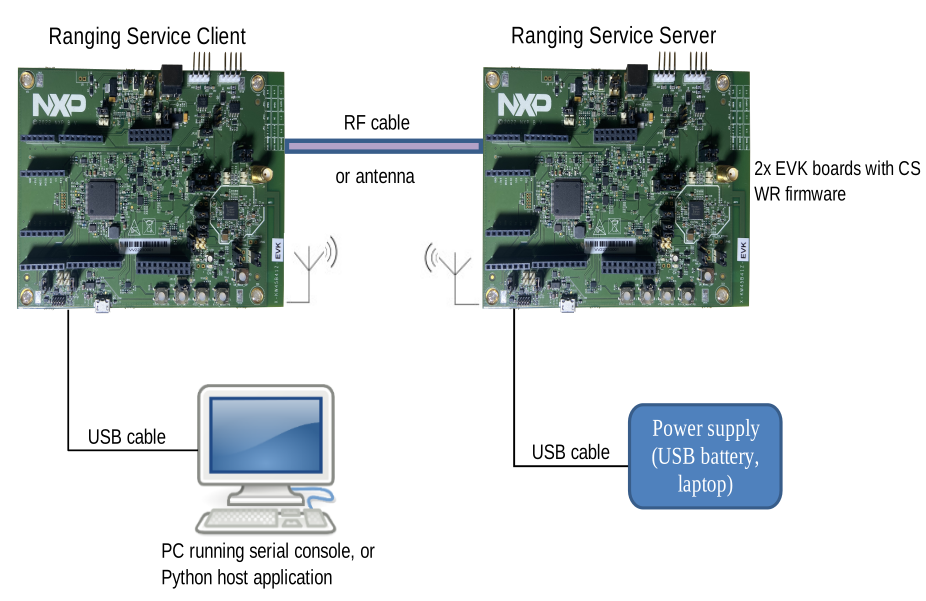
The first board (ranging service client) should be connected to the PC running the host application (see Python host application setup) using a USB cable. Once flashed, the second board (ranging service server), may be connected to a USB battery to facilitate movement.
Start the evaluation of this ranging system with a cabled configuration. Once the system operation is properly understood, the evaluation can be pursued in more challenging environments (with multi-path and interference).
To perform cabled measurements with KW47 boards, a small hardware modification must be done on the PCB. Rotate a capacitor to bypass the printed antenna and connect the RF path to an external SMA connector.
For further details, refer to the documentation corresponding to your board of choice. To perform radiated testing, connect an SMA-mounted antenna on each board instead of a cable.
Figure: Typical wireless ranging setup using KW47-EVK boards
Parent topic:Wireless ranging demo application setup
Hardware set up with antenna diversity#
To enable antenna diversity on KW47-EVK boards, antenna diversity boards (X-FR-ANTDV-IFA or X-FR-ANTDV-MPIFA) must be plugged to the EVKs using a similar setup as described in Hardware set up with single antenna configuration. The X-FR-ANTDV-IFA is a preferred option. Currently, only the X-FR-ANTDV-IFA is being distributed to the customers.
For a detailed setup description, see Antenna Diversity Board User’s Guide (document ADBUG).
Figure: Antenna diversity board mounted on KW45 EVK board
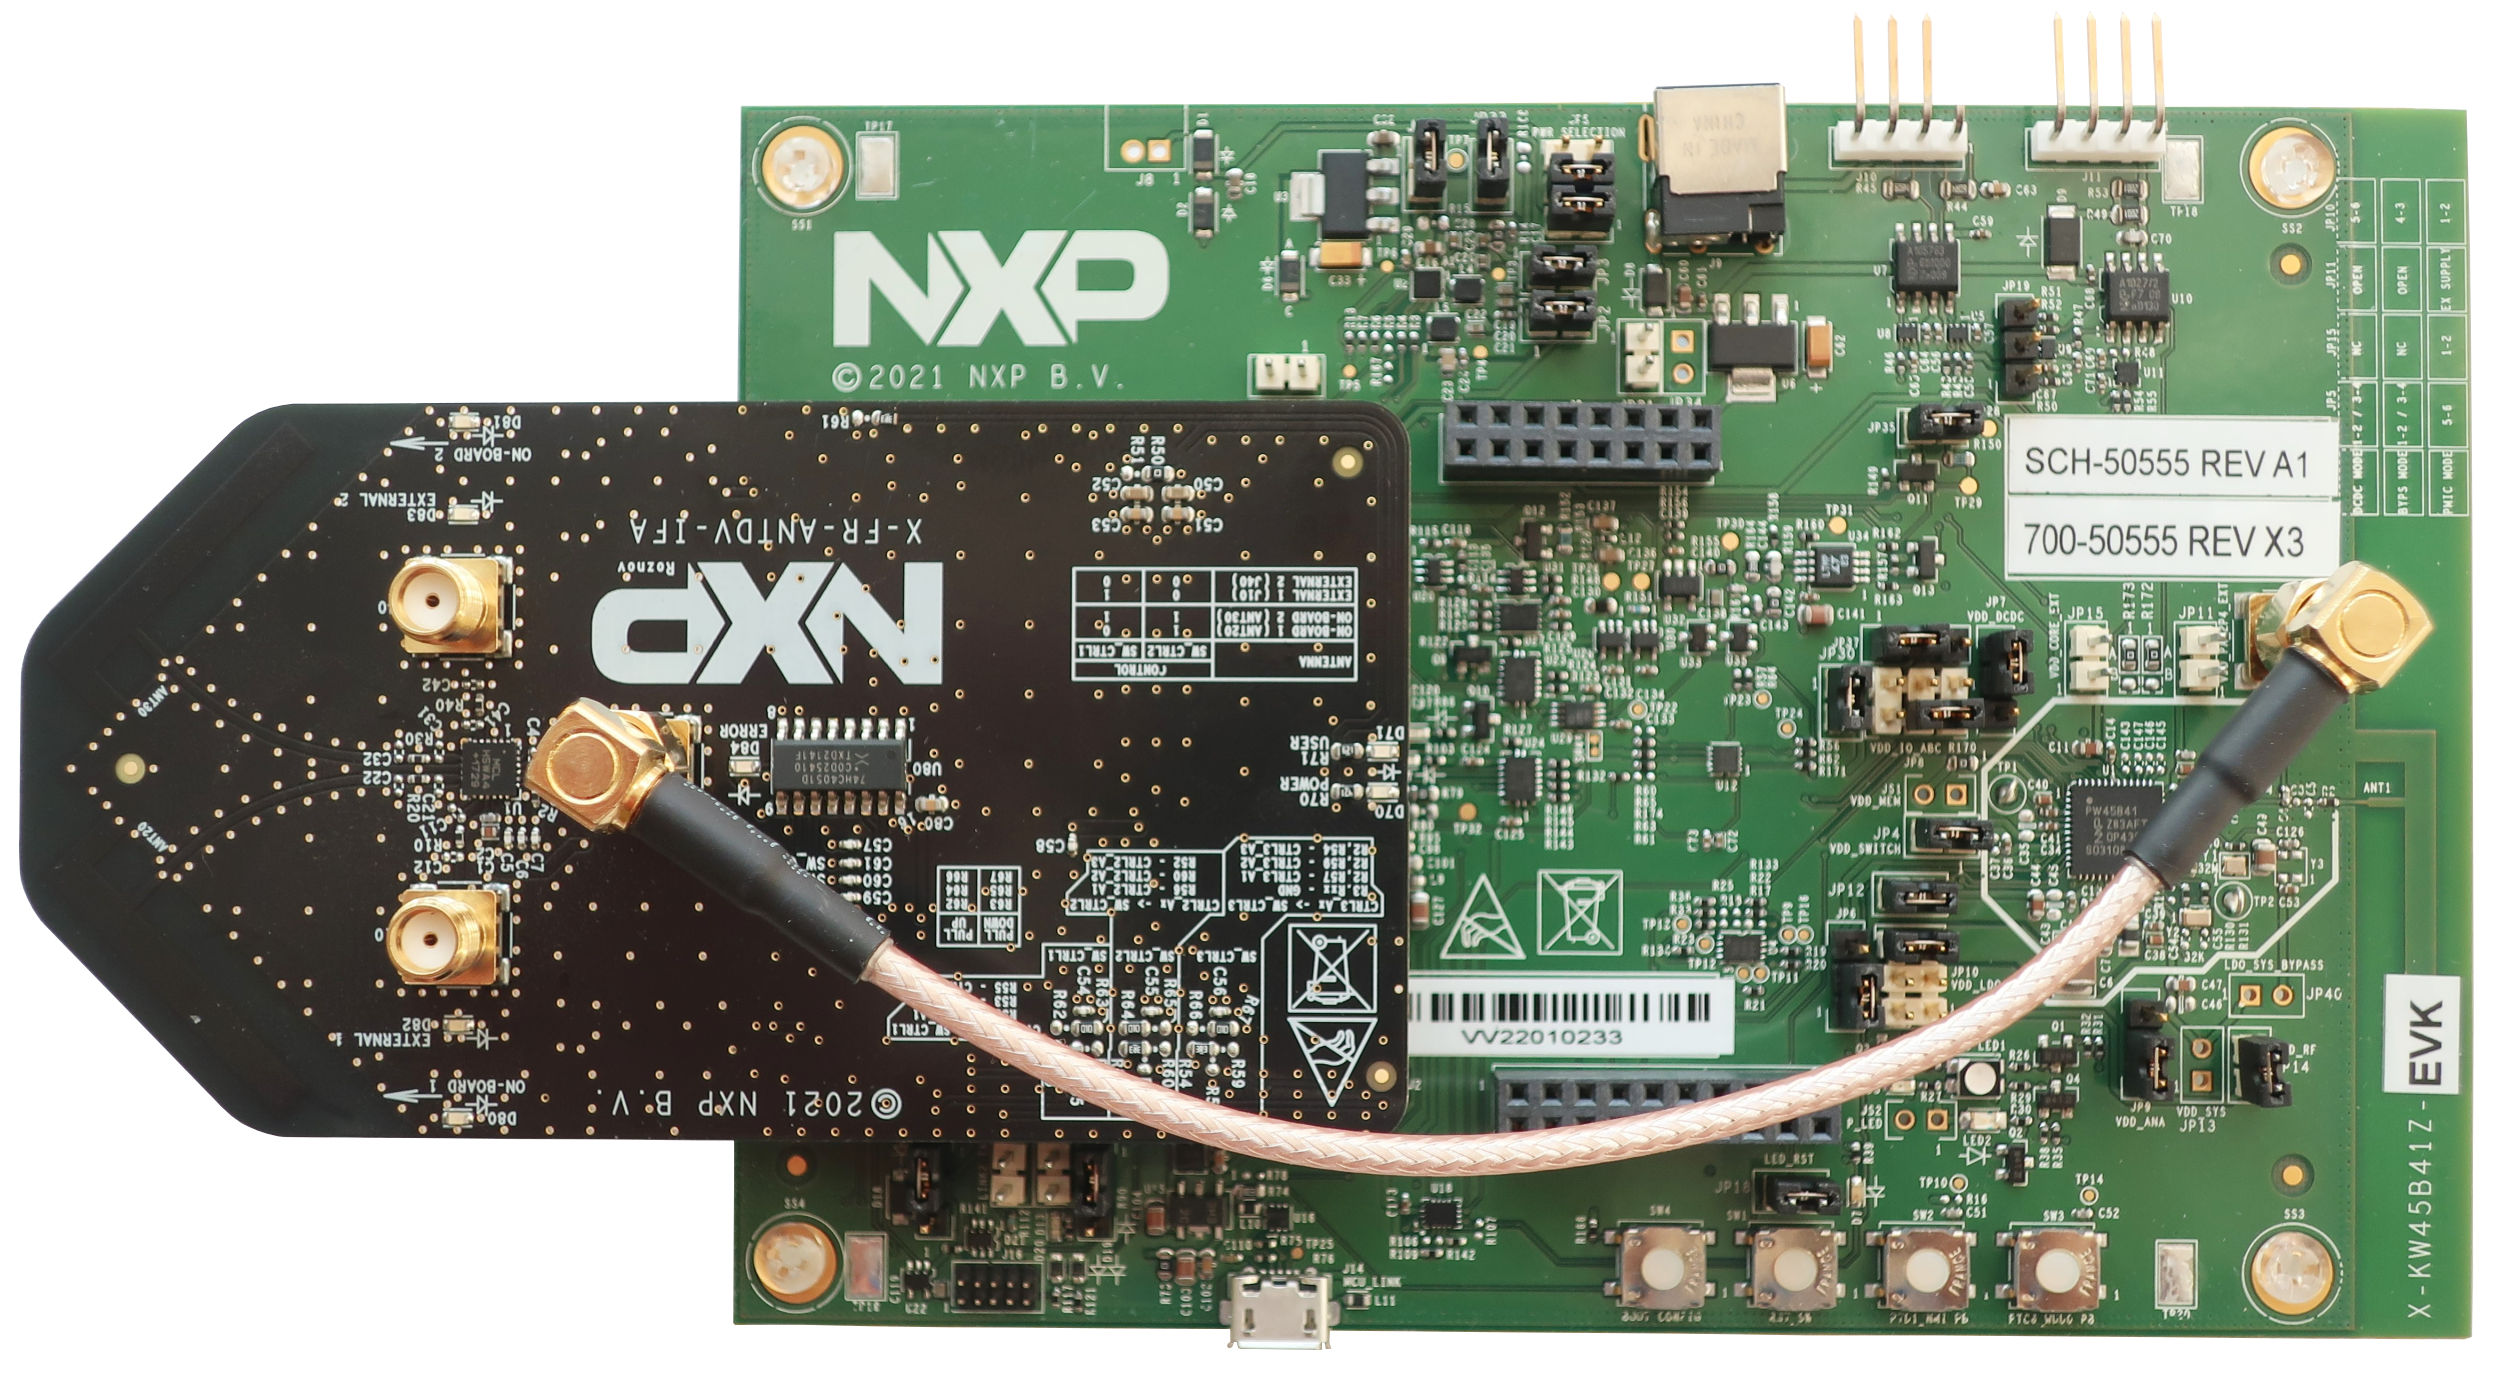
From antenna diversity boards, you must choose the pair of antennas, either the two SMA connectors or the two printed antennas, to be used.
Another convenient way to enable antenna diversity testing is to use KW47-LOC board which embeds two printed antennas on the same PCB. For a detailed description of this board and how to set it up, refer to KW47-LOC Board User Manual.
To configure antenna diversity properly in the firmware, it is required to configure the following:
Antenna diversity board type and antennas used (SMA connectors or printed antennas)
Antenna configuration index
Antenna switching time (T_SW)
Note: All platforms support only 1x1 or 2x2 antenna configurations, leading to either one or four antenna paths being used.
Parent topic:Wireless ranging demo application setup
Firmware setup#
To install the firmware on the boards, perform the steps below:
Note: The firmware must be installed on the two boards following those two steps.
Update your NBU image with the provided binaries in the following folder of the SDK:
../middleware/wireless/ble_controller/bin(*_hadm_* for KW45 family).Compile the application
wireless_ranging_bluetooth_bmby referring to the quick start guide specific to your platform. The application can be found in the directory:\\boards\<board>\wireless_examples\bluetooth\wireless_rangingFlash the binary on both devices. Flash the application using your preferred IDE.
Parent topic:Wireless ranging demo application setup
Serial console setup#
Wireless ranging application can be used either by using a console or by using a Python script environment. To use the console, connect to each device COM port with Tera Term using the setup (putty is not supported), as shown in the figure below.
Figure: Tera Term configuration for operating with wireless ranging
Parent topic:Wireless ranging demo application setup
Python host application setup#
To use the Python host application, go to tools\lcl_host. This folder is referred later in the document as <app_folder>.
This application is a Python application which requires several packages and Python 3.12 or newer. The supported OS is Windows. It has not been tested on other Python-capable OS.
The recommended approach is to install the required packages inside a Python virtual environment. This keeps the packages isolated from your system-wide Python installation and avoids conflicts with existing packages.
The list of required packages is provided in <app_folder>\python\requirements.txt. The same packages are also listed in <app_folder>\python\Pipfile.
To use the Python host application, follow the steps below:
Note: The following installation procedure is provided for Windows. Use Windows command prompt to execute commands below.
Install Python 3.12 or newer for 64-bit platform.
Note: The “python” executable must point to Python 3.12 or newer (use
python -Vto check the version).Go to the
<app_folder>/pythonfolder and create a virtual environment.cd <app_folder>/python python -m venv .venv
Activate the virtual environment.
source .venv\Scripts\activate
After activation, the command prompt is prefixed with
(.venv).Install the required packages inside the virtual environment.
pip install -r requirements.txt
This command may take several minutes to complete.
When you are done, you can leave the virtual environment by running deactivate. Remember to activate the virtual environment again (step 3) before running the host application in a new terminal session.
Parent topic:Wireless ranging demo application setup