TwinCAT EEPROM Update#
Import the SubDevice ESI file#
Copy the ESI file ‘ECAT-SERVO-MOTOR.xml’ generated by SSC tool to TwinCAT install directory: C:\Program Files/3.1/Config/io/EtherCAT/ in general.
Create a new project#
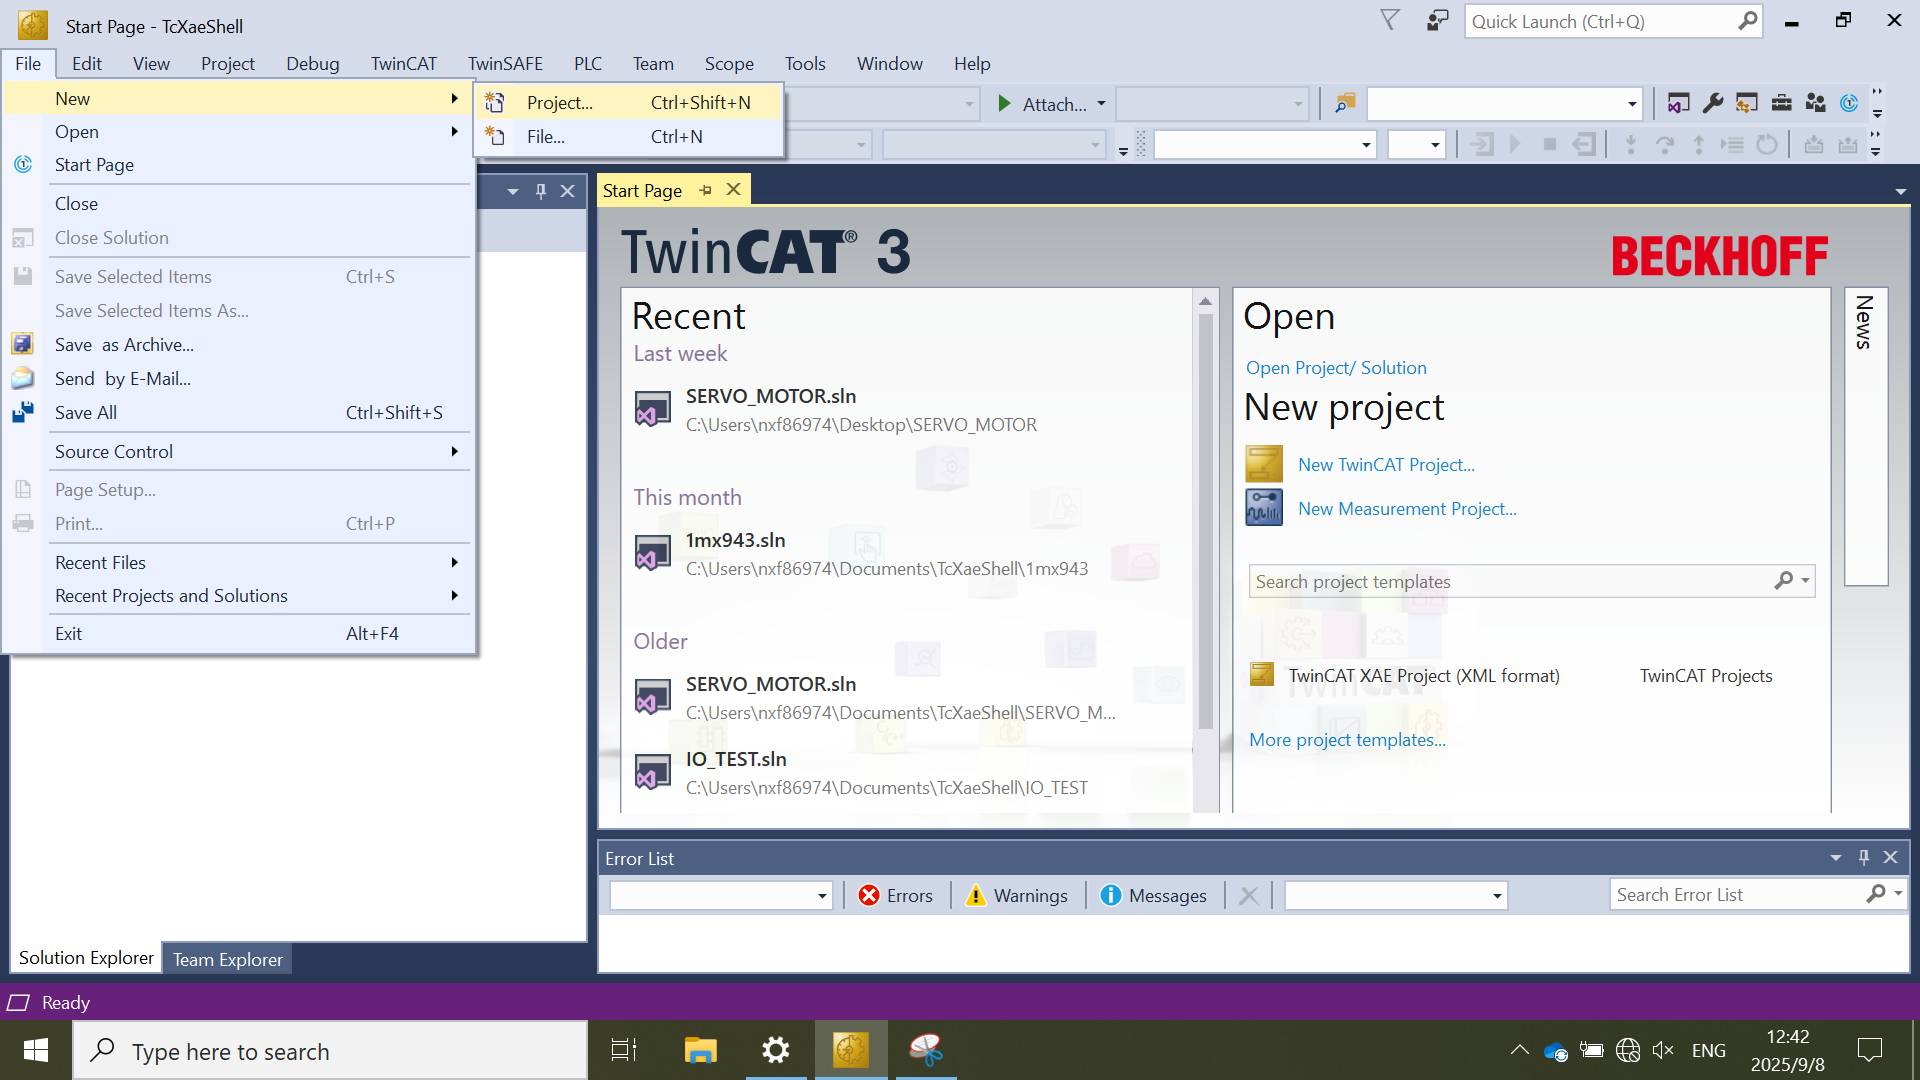
Select File > New > Project.
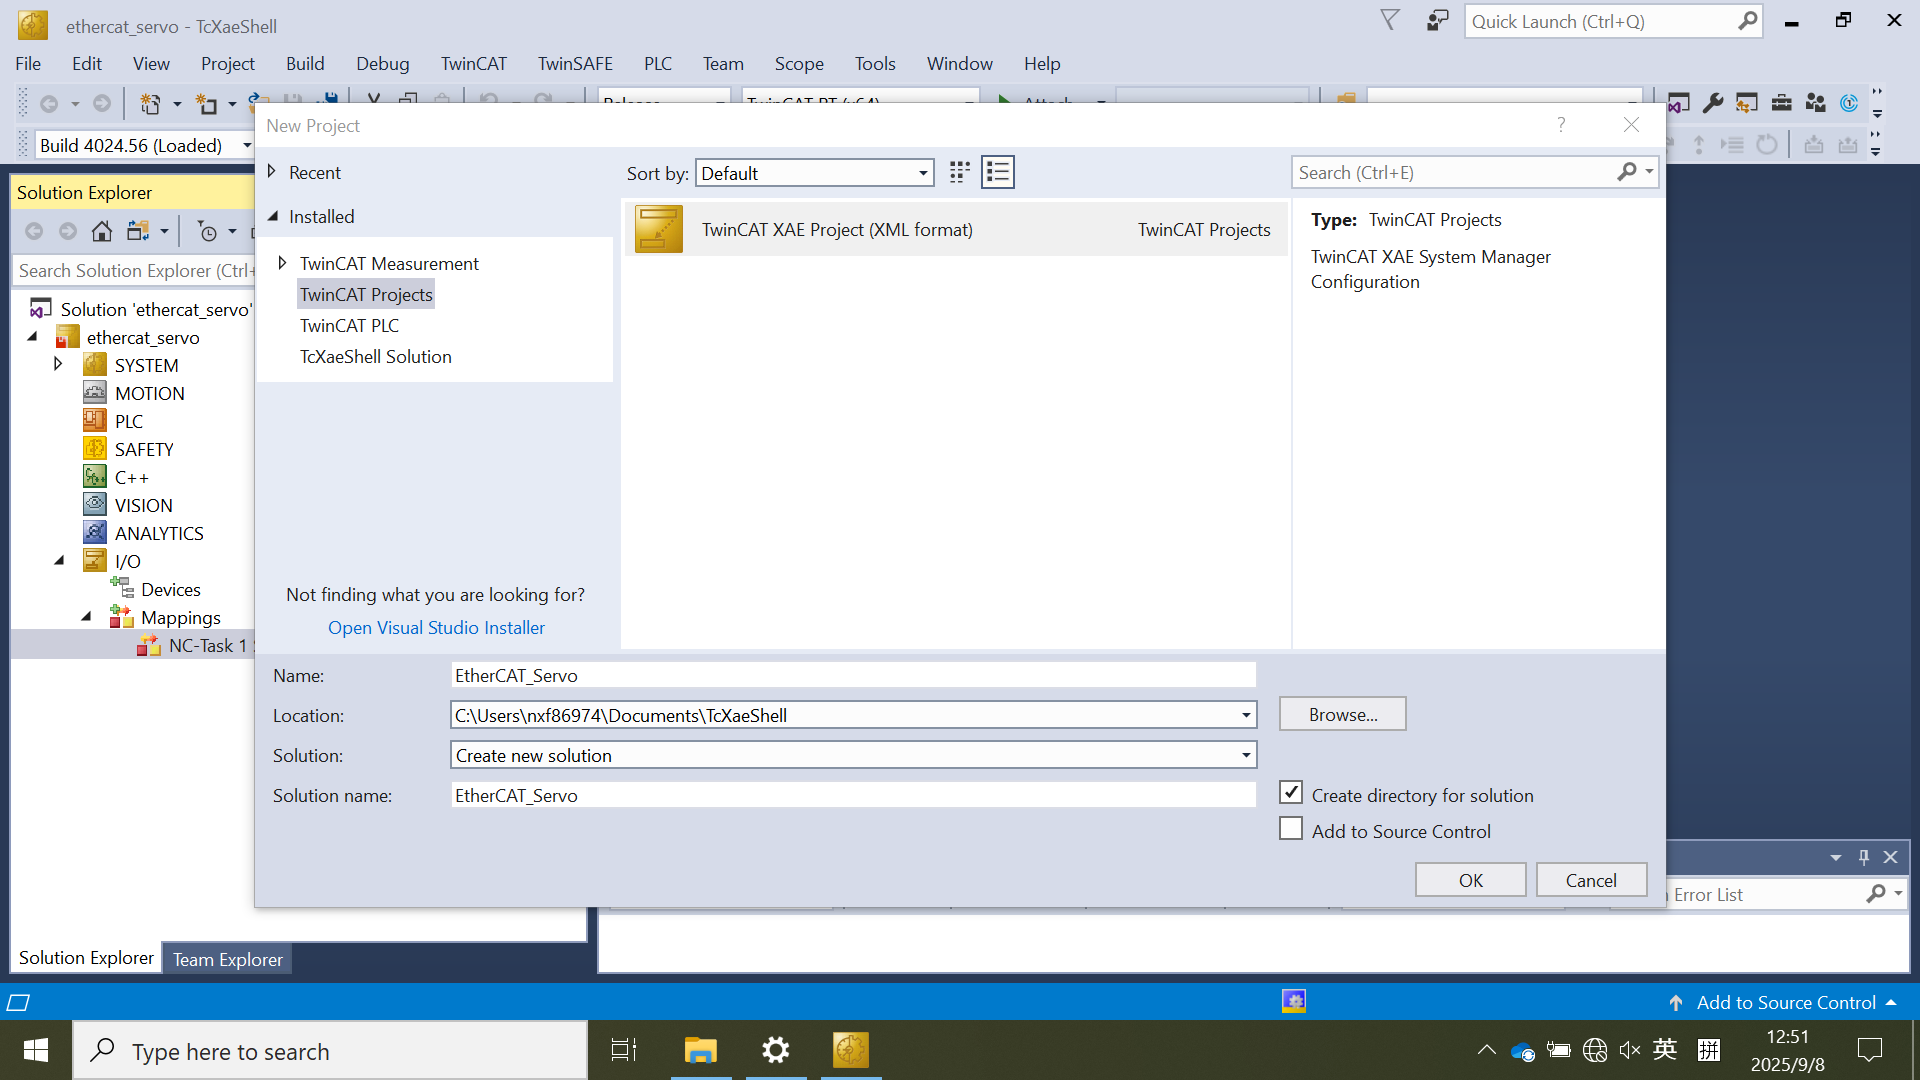
Select TwinCAT Projects and name this project EtherCAT_Servo.
Click OK.
Update the ESI file to EEPROM#
Note: The EEPROM update is required if the servo motor example is set up at first time on the board.
Scan the subdevices#
Right-click on Device > Scan in the Solution Explorer pane.

Select the realtime network interface connected with the SubDevice.
Click OK.
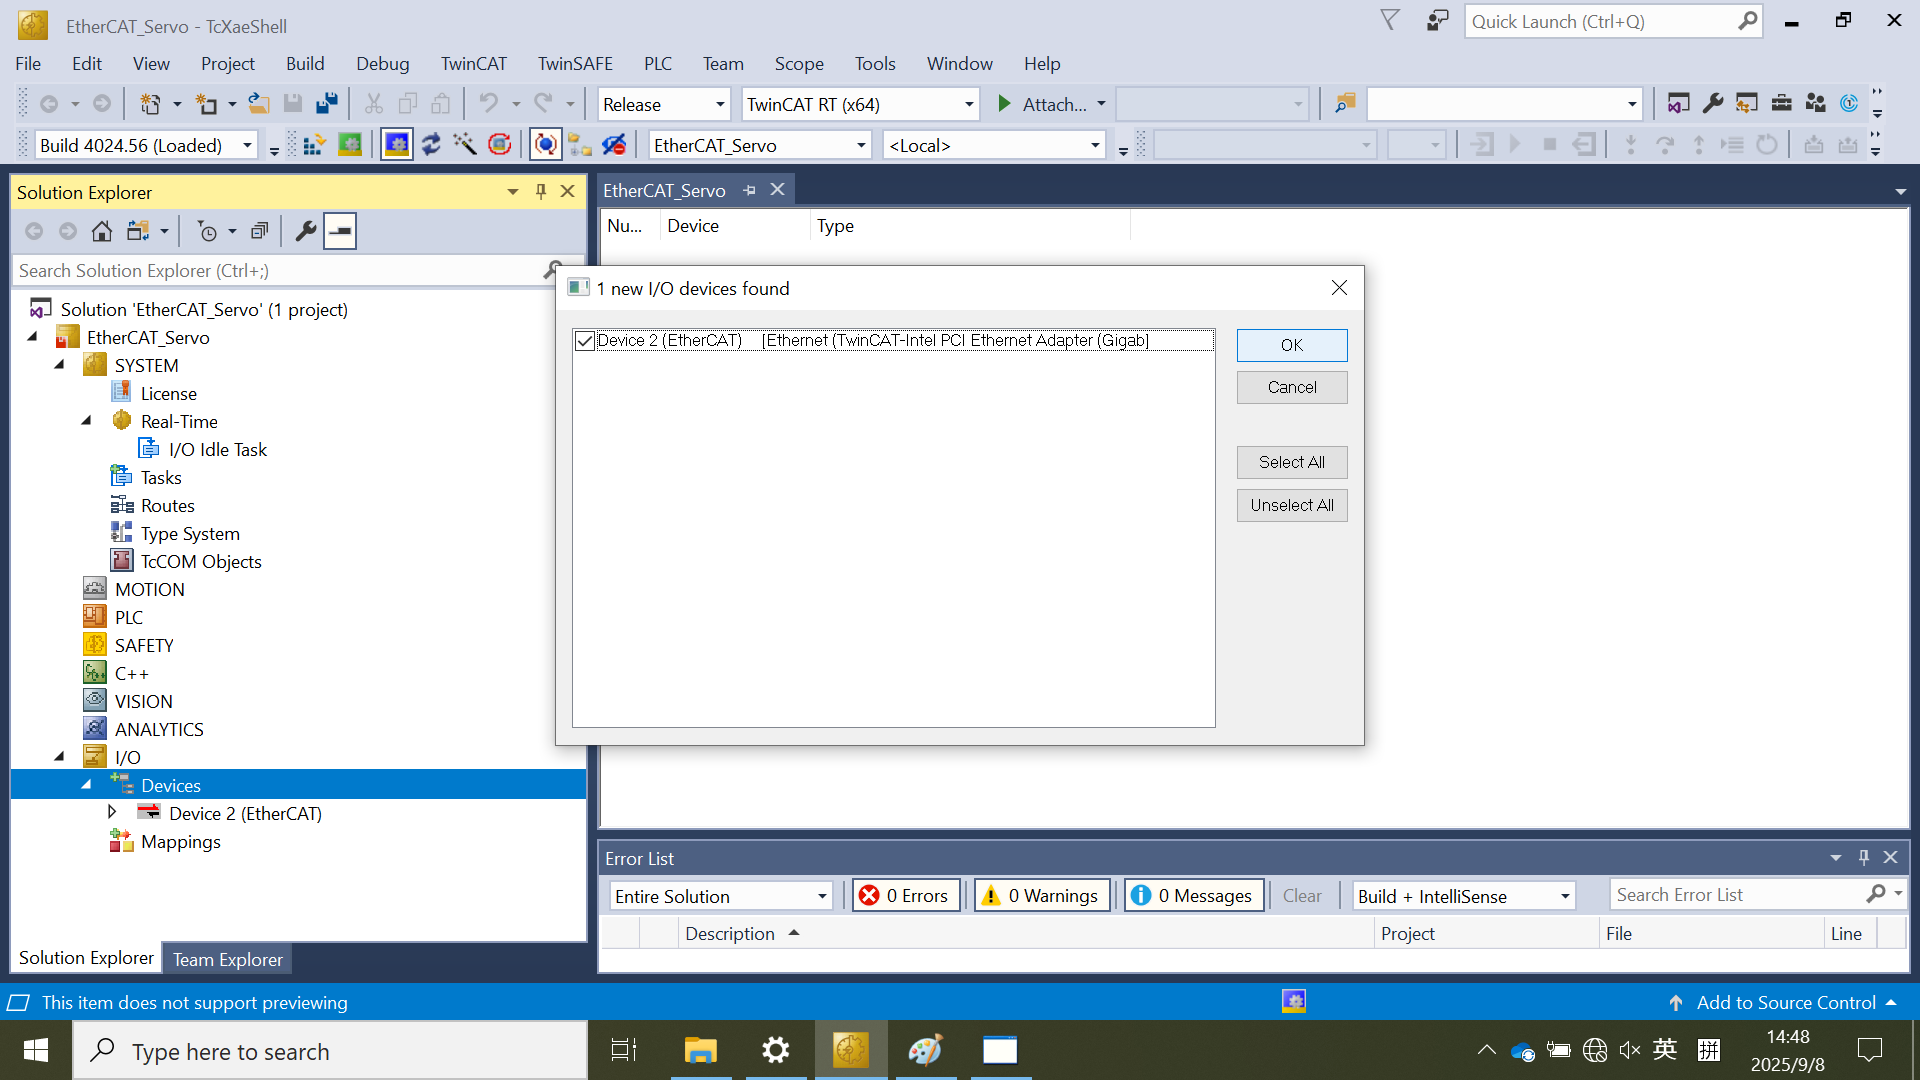
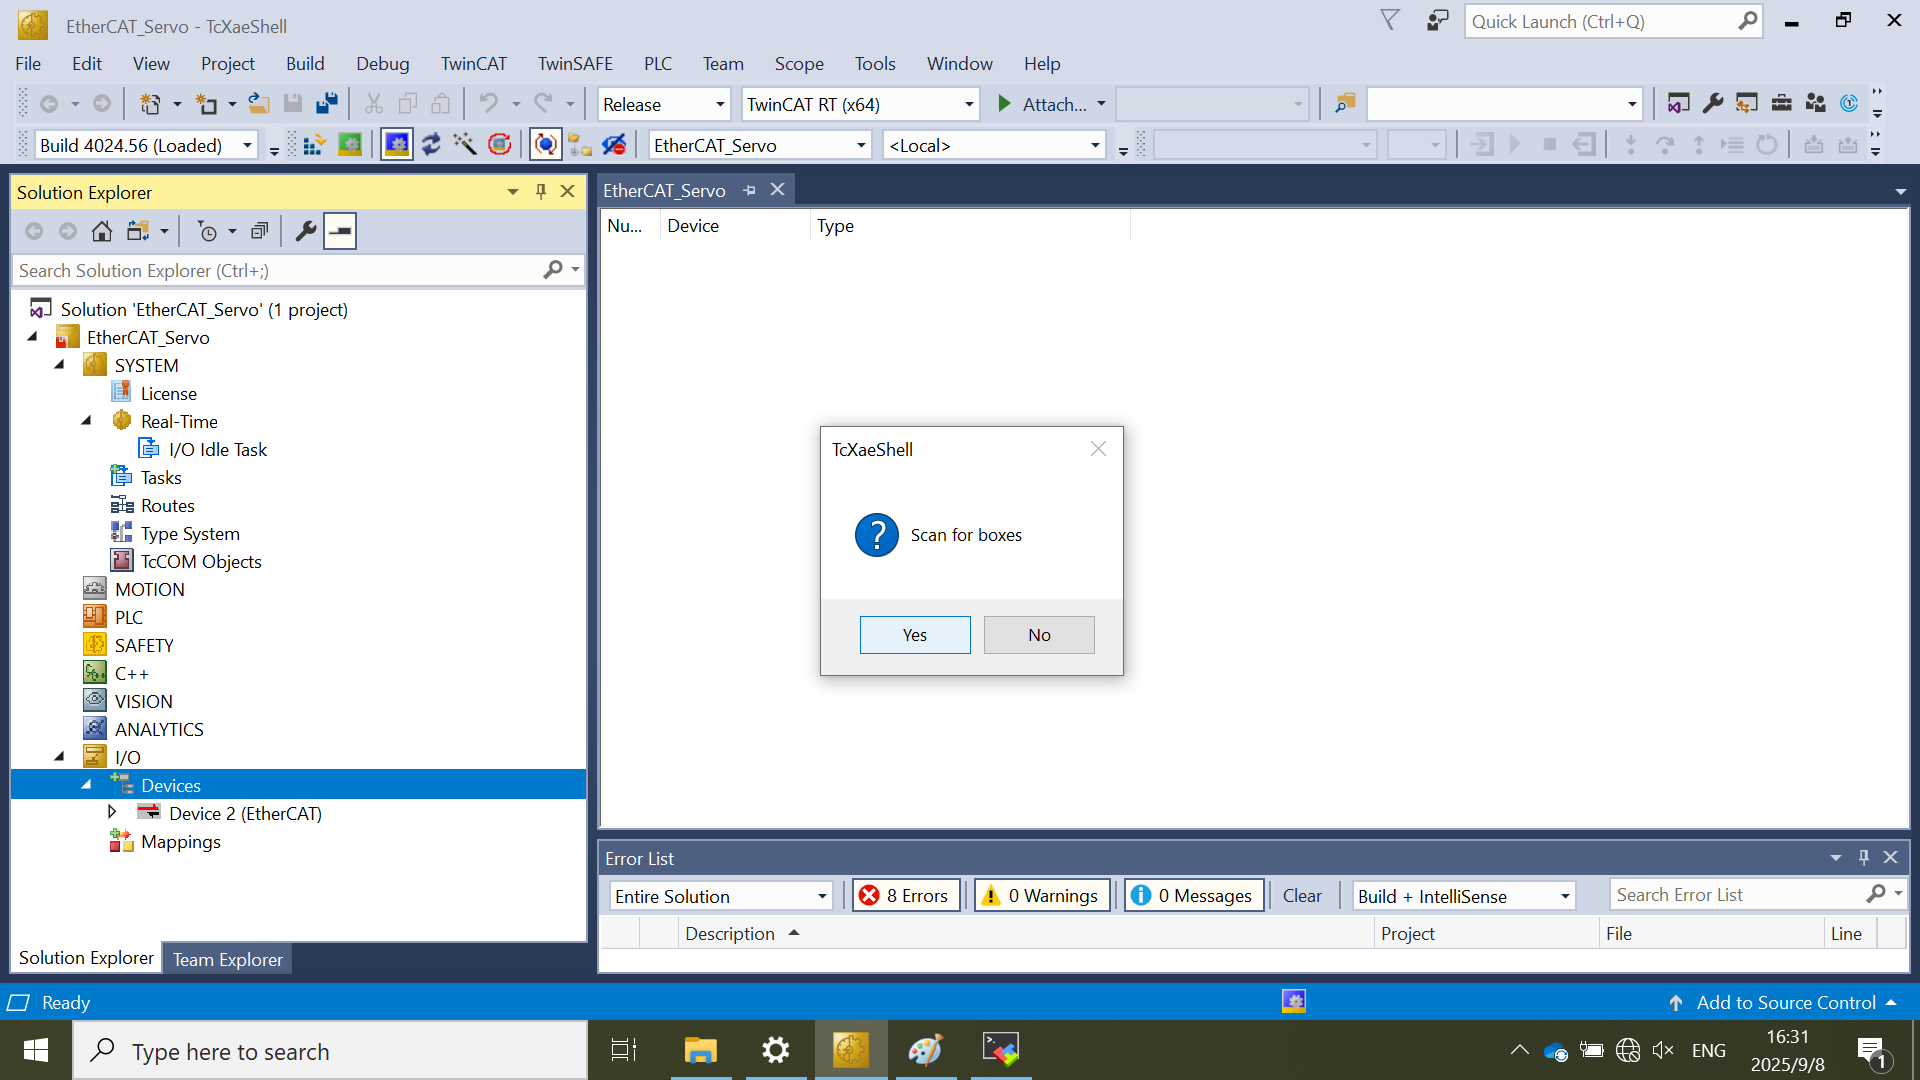
Click Yes to scan for boxes.
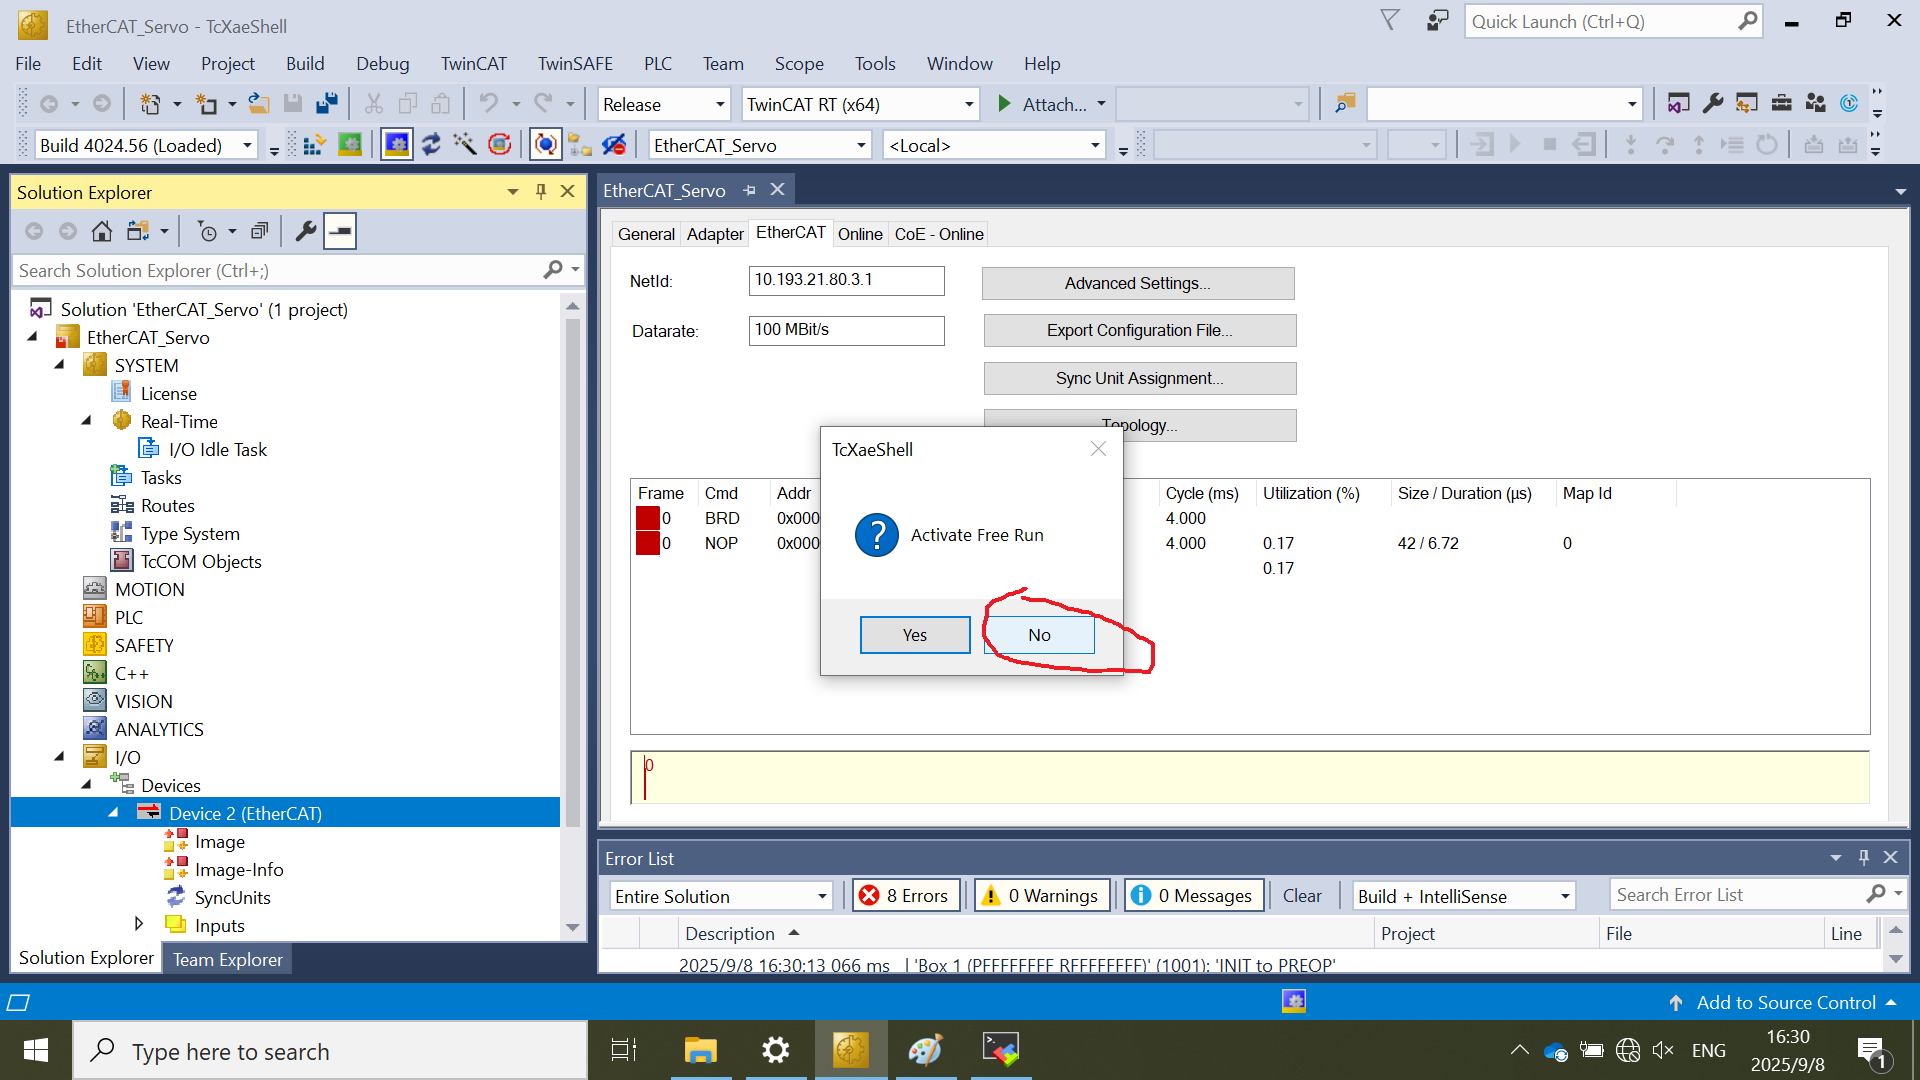
Click No to refuse to activate Free Run mode
EEPROM Update#
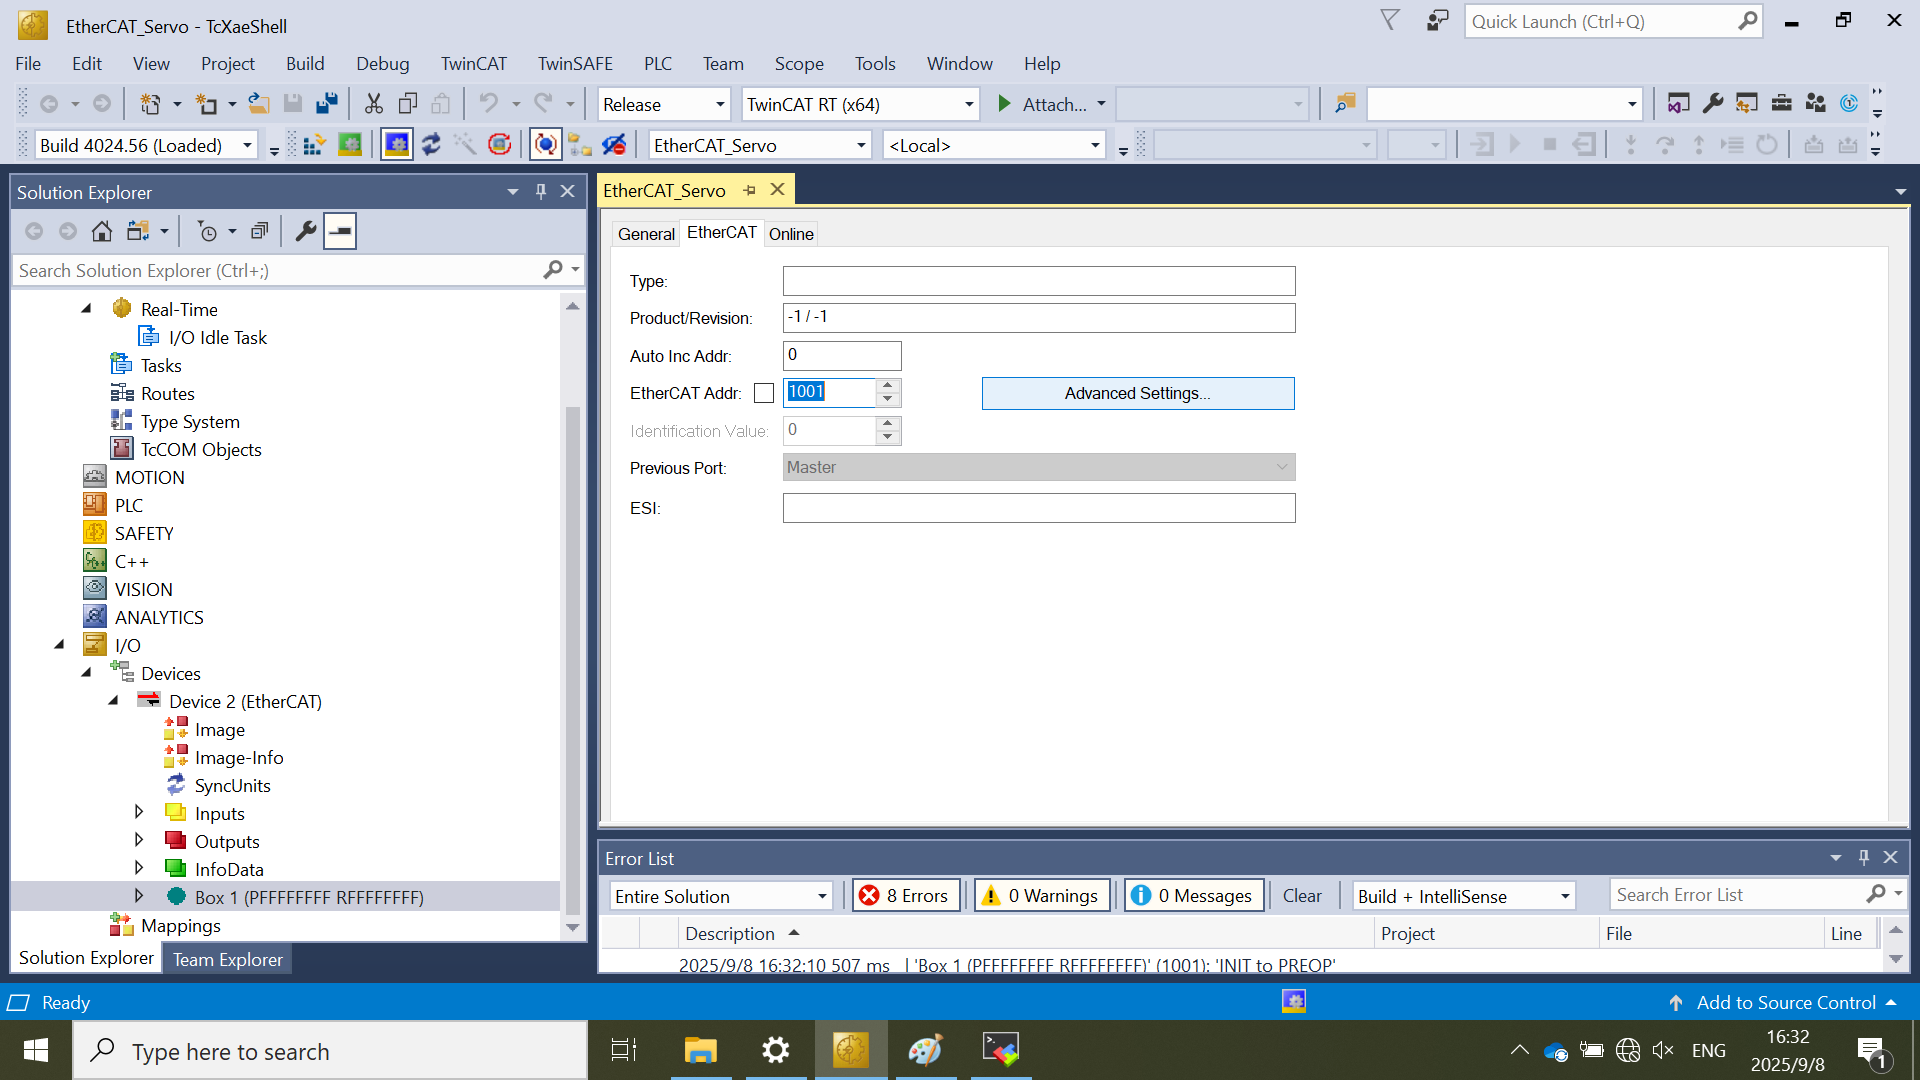
Select the subdevice under EtherCAT devices node: Device X (EtherCAT)
Double-click the Subdevice: Box 1 (PFFFFFFFF RFFFFFFFF).
Click the EtherCAT tab.
Click the Advanced Settings button.
Select ESC Access > Smart View and click the Write EEPROM button.
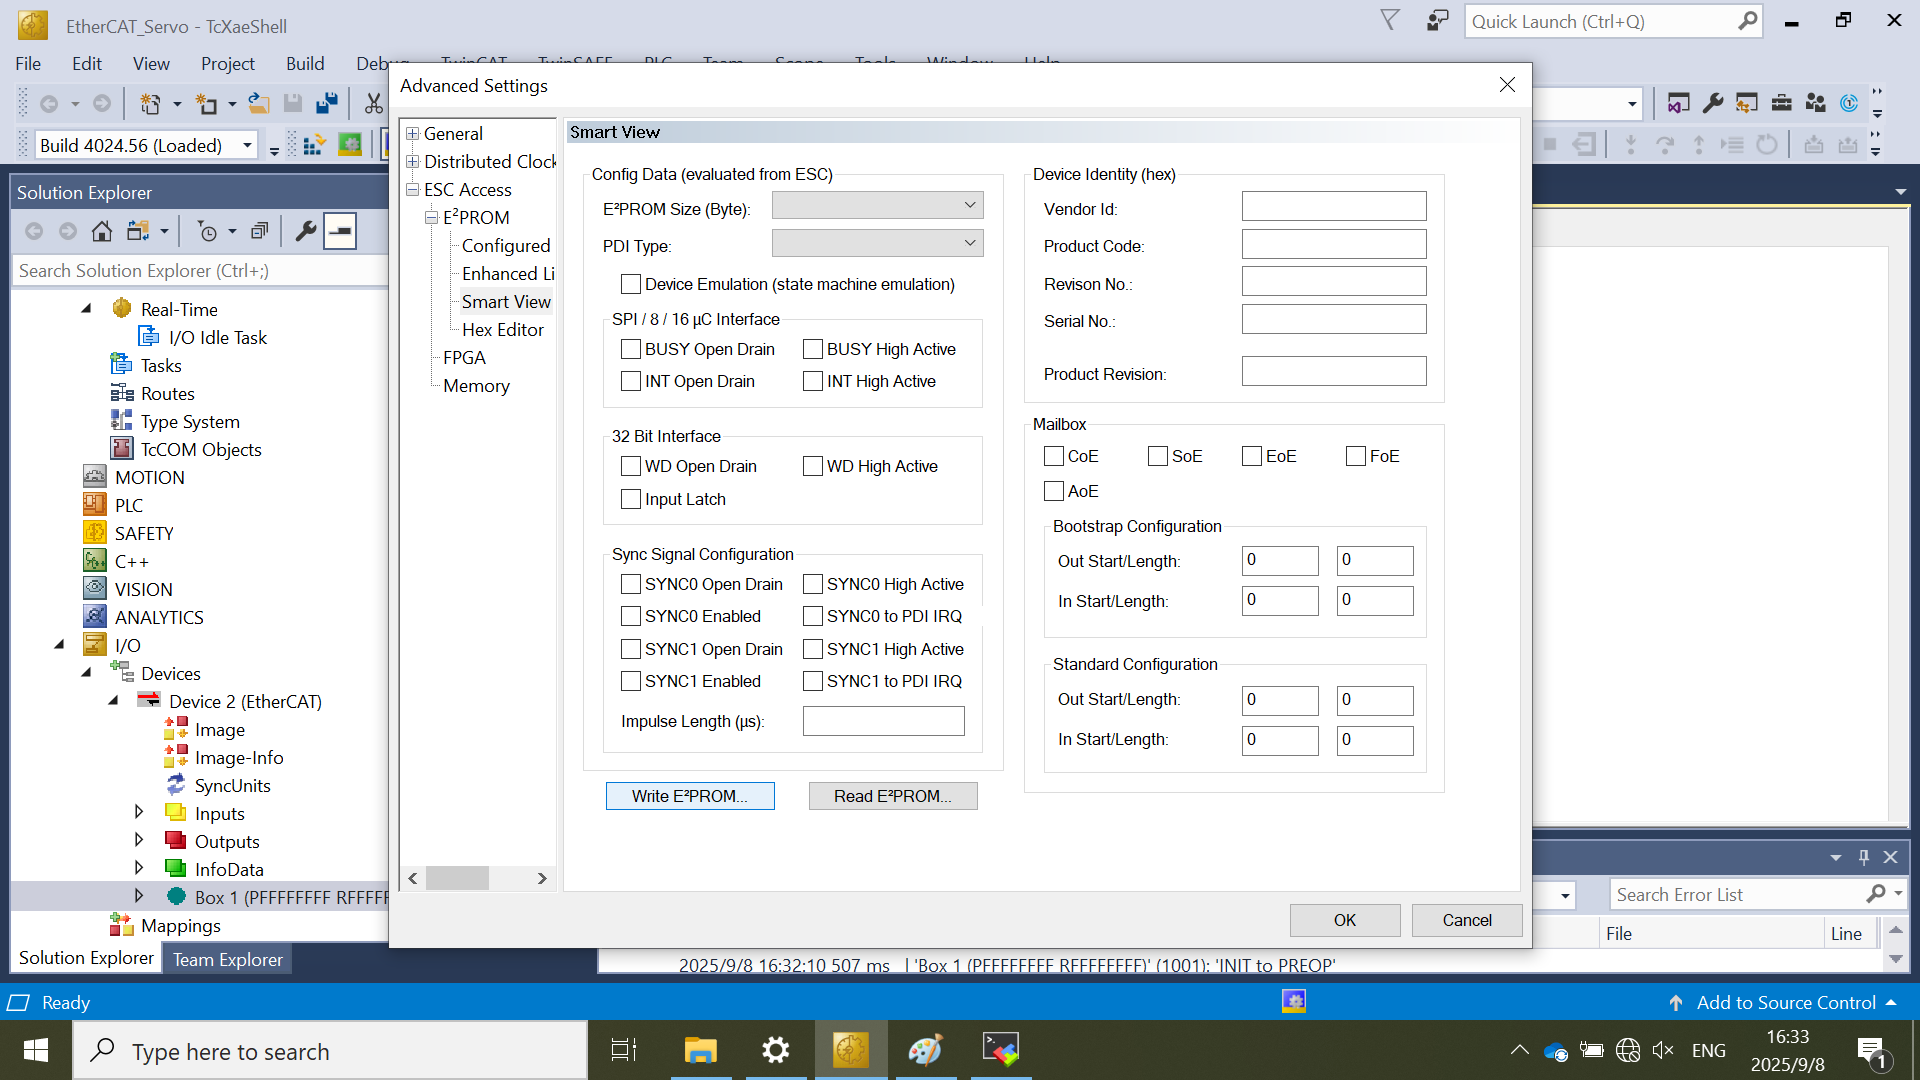
Select NXP > ECAT > ECAT-SERVO-MOTOR.
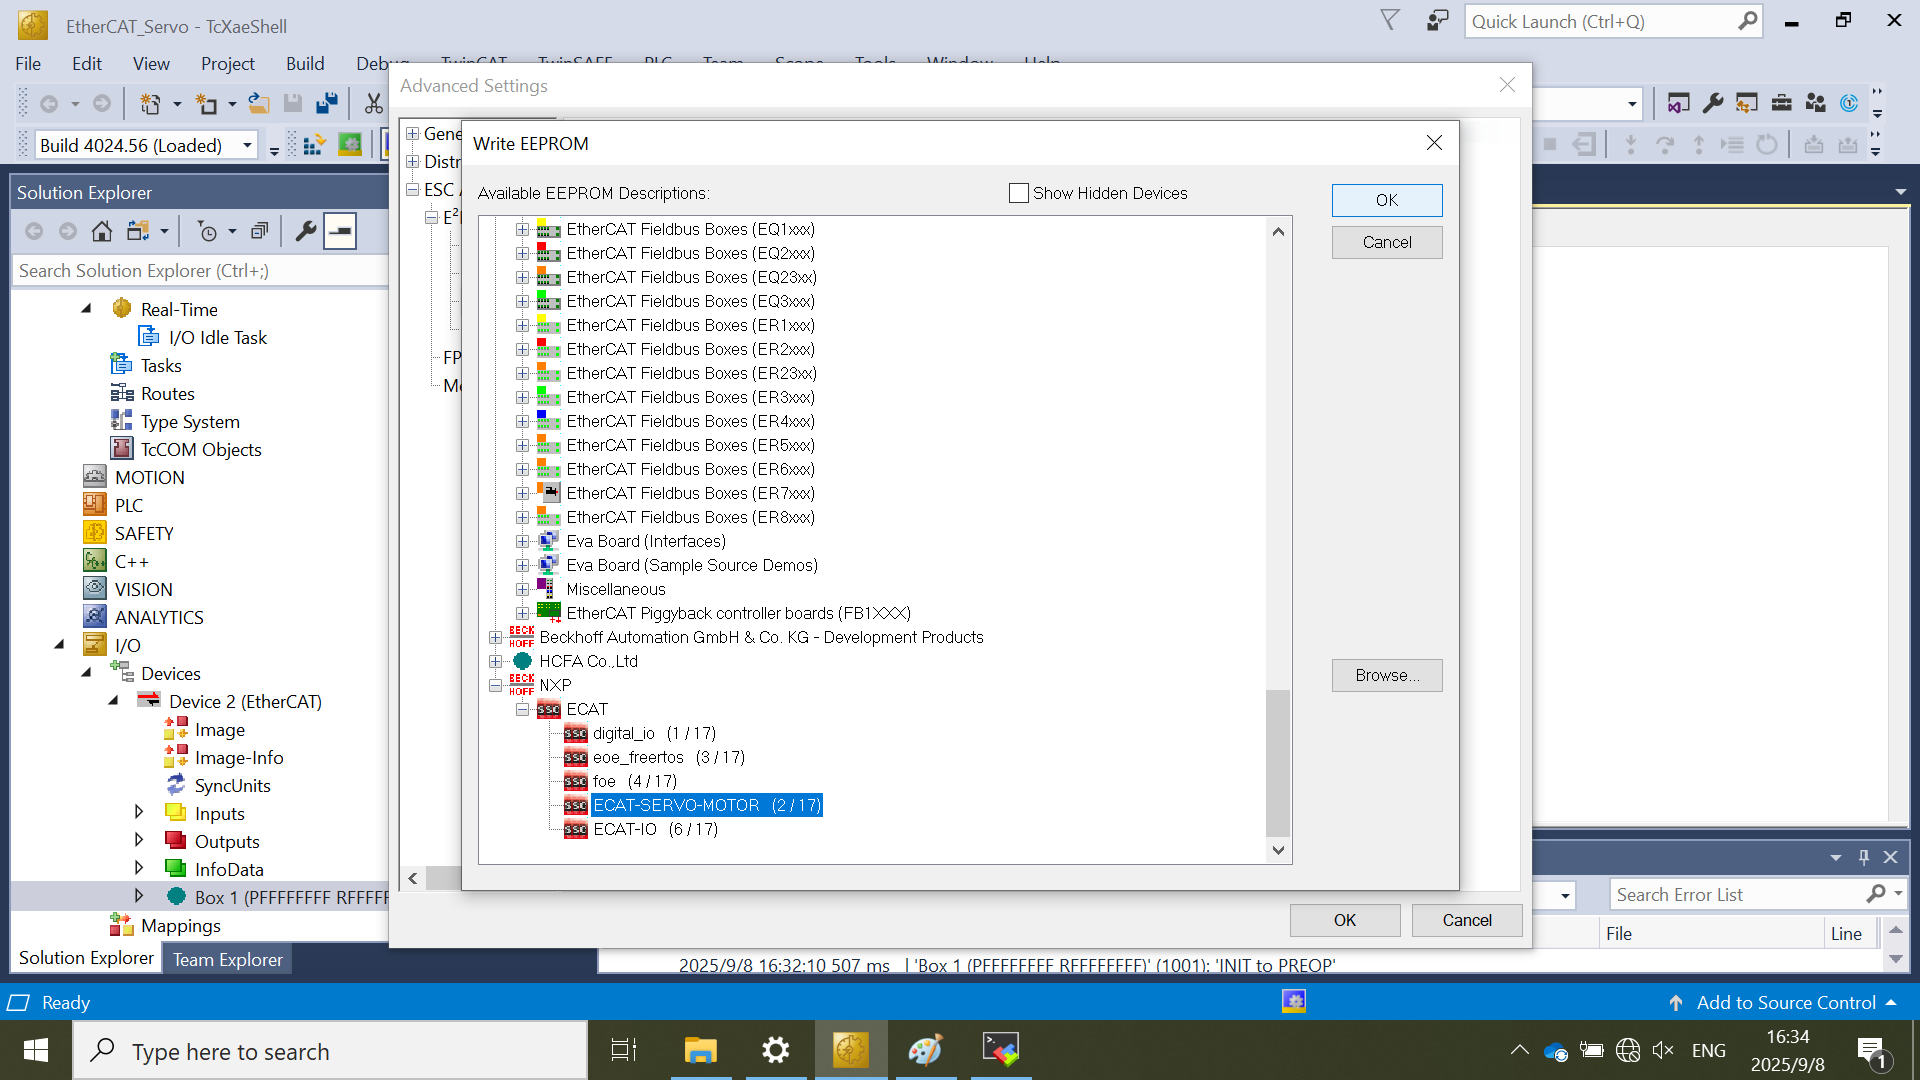
Click OK.
After EEPROM update completion, click Ok to exit. The status of EEPROM writing is shown on the bottom of TwinCAT IDE.
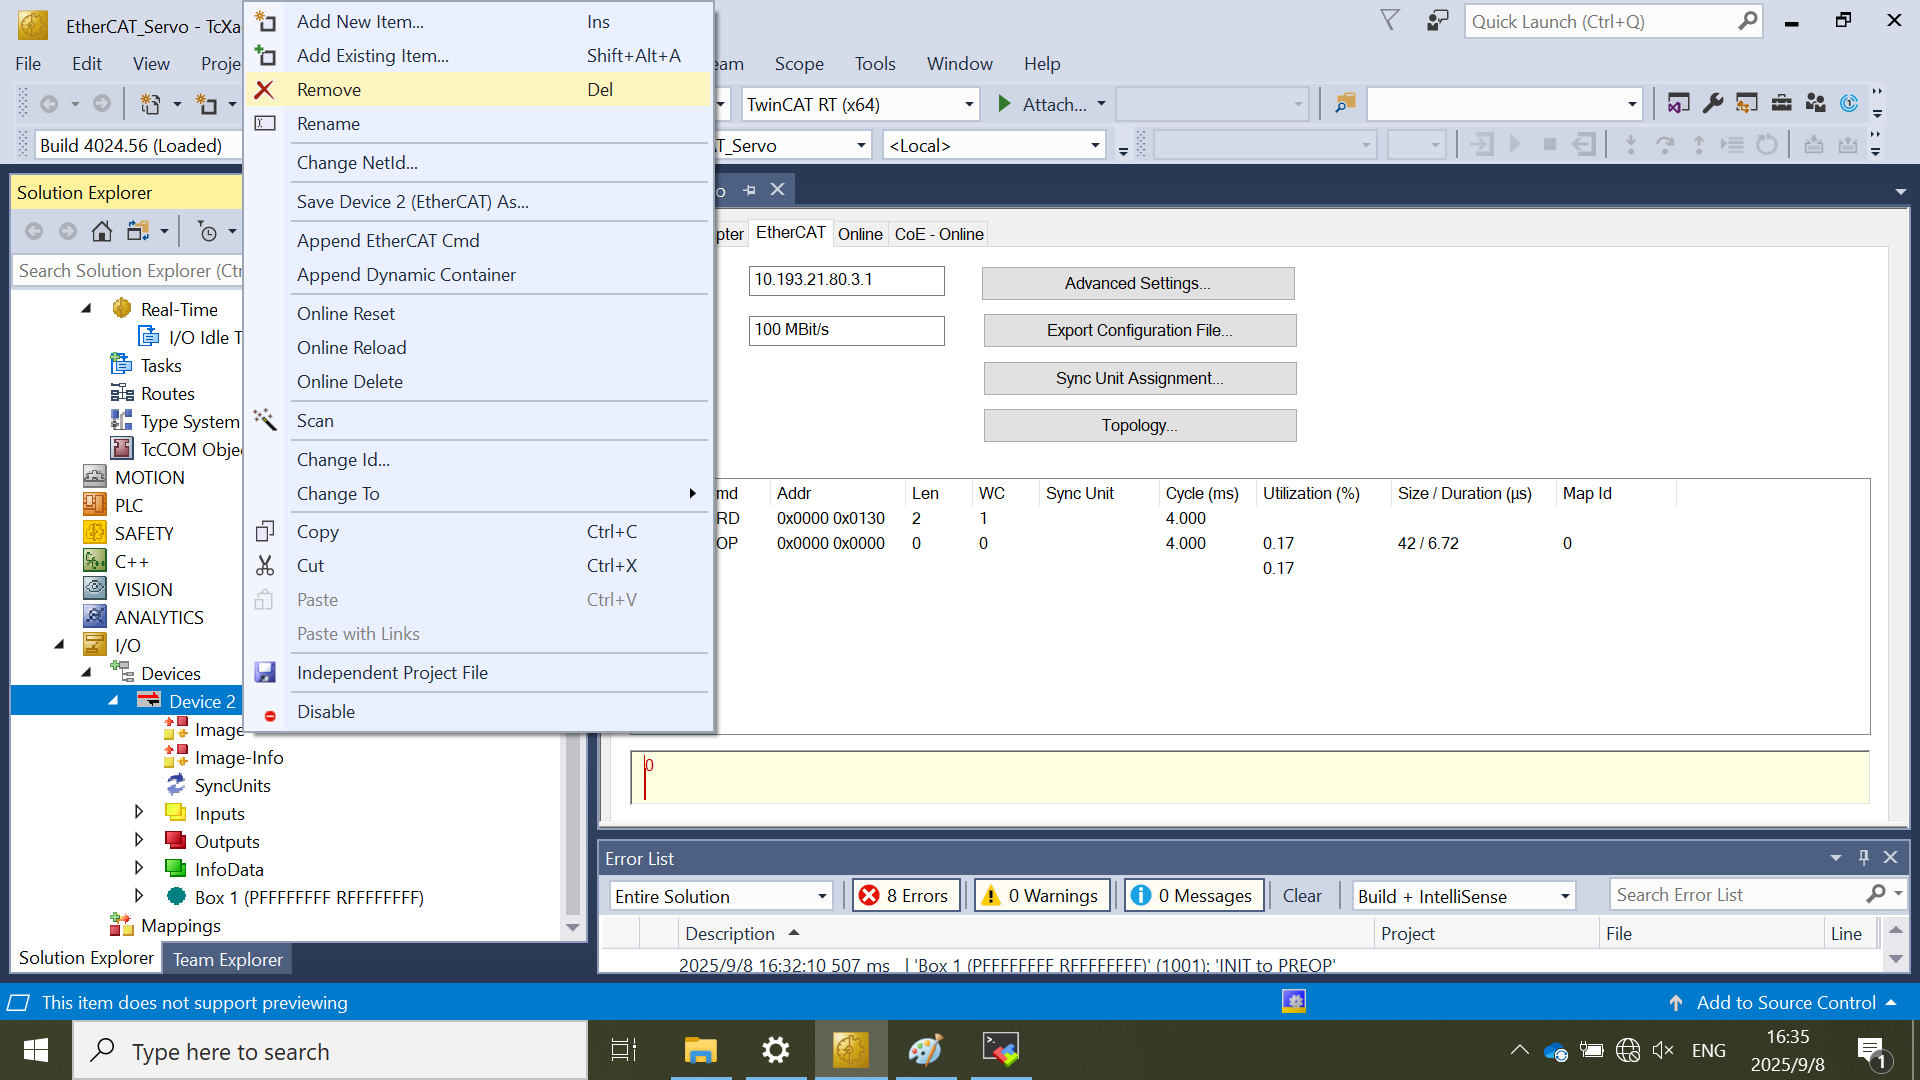
Right-click on Device X (EtherCAT) node and remove the Device X (EtherCAT) node.